
Blog

  • Barbell Training for Adults: Strength, Power & Longevity

    Barbell Training for Adults: Strength, Power & Longevity

    You don’t need a fancy gym setup or years of experience — just a barbell, a little guidance, and the willingness to show up consistently.

    Picture this: you walk into a gym, you see a barbell loaded with plates sitting on a squat rack, and something between curiosity and intimidation pulls you toward it — then past it, straight to the cable machine. Sound familiar? You’re not alone. Barbell training has a reputation for being reserved for powerlifters and competitive athletes, but that couldn’t be further from the truth.

    Barbell training is one of the most efficient, evidence-backed approaches to building strength, improving posture, supporting metabolic health, and even reducing the risk of injury over time. Whether you’re 28 or 58, a complete beginner or someone returning after years away from lifting, barbell work can be adapted to your level and goals.

    In this guide, you’ll learn exactly why barbell training deserves a spot in your fitness routine, how it actually works in the body, where to start safely, what mistakes to avoid, and how to track progress you can actually feel. Let’s break the intimidation factor down for good.

    Why Barbell Training Matters More Than You Think

    Most adults lose between 3% and 8% of muscle mass per decade after age 30 — a process called sarcopenia. By age 60, that decline can significantly affect energy levels, metabolism, joint stability, and even cognitive function. The American College of Sports Medicine (ACSM) recommends resistance training at least two days per week for all healthy adults, specifically to counter this muscular decline.

    But here’s where barbell training stands apart from machines or even dumbbells: it uniquely loads the entire kinetic chain. When you perform a barbell squat or deadlift, you’re not just training your legs — you’re activating stabilizers in your core, hips, spine erectors, and upper back simultaneously. That full-body recruitment is what makes barbell work so time-efficient and effective.

    A large-scale review published in the British Journal of Sports Medicine found that muscle-strengthening activities — particularly those using free weights — were associated with a 10–17% lower risk of all-cause mortality, cardiovascular disease, and cancer. These aren’t small numbers. They reflect the kind of systemic health impact that few other exercise modalities can match.

    And the benefits aren’t just physical. Barbell training has been linked to improved insulin sensitivity, better bone mineral density, reduced symptoms of anxiety and depression, and greater functional independence as you age. If you’re looking for one training tool with the widest range of returns on investment, the barbell is a serious contender.

    How Barbell Training Actually Works in Your Body

    The core principle behind barbell training is progressive mechanical tension — systematically increasing the load your muscles must overcome in order to produce adaptation. When you squat, press, or pull a barbell under load, muscle fibers experience microscopic damage. During recovery, those fibers rebuild thicker and stronger through a process driven by protein synthesis and hormonal signaling, including testosterone, growth hormone, and insulin-like growth factor 1 (IGF-1).

    One common myth is that you need heavy, ego-driven loads to get results. Research published in the Journal of Strength and Conditioning Research has repeatedly shown that moderate loads — around 60–75% of your one-rep maximum — performed with full range of motion and controlled tempo can produce muscle and strength gains comparable to heavier loads, especially for beginners and intermediate lifters. Technique and consistency outrank weight on the bar.

    Another misconception worth addressing: barbell training will bulk you up in an undesirable way. For the vast majority of adults — especially women — gaining significant muscle mass requires years of dedicated, high-calorie training. Most people who add barbell work to their routine simply look leaner, move better, and feel more capable. The "too bulky" concern is largely a myth born from misunderstanding how muscle growth actually works.

    Barbell training also trains the nervous system. Early strength gains — often experienced in the first 4–8 weeks — are primarily neuromuscular: your brain gets better at recruiting motor units and coordinating muscle firing patterns. This is why new lifters often feel and perform significantly better even before major changes in muscle size occur.

    How to Get Started: Practical Steps for Every Level

    Starting barbell training doesn’t require a personal record on day one. It requires patience, consistency, and a solid foundation of movement quality. Here’s how to approach it at every level:

    Beginner (Weeks 1–6): Build the Patterns

    • Start with an empty barbell (typically 45 lbs) or even a PVC pipe to learn the movement patterns without loading the joints prematurely
    • Focus on the four foundational movements: squat, hinge (deadlift), horizontal press (bench press), and vertical pull (barbell row)
    • Train 2–3 days per week with full-body sessions; allow at least 48 hours between sessions for recovery
    • Record your sets, reps, and weight every session — progress tracking is essential from day one
    • Consider two to four sessions with a certified personal trainer (NASM, ACSM, or NSCA credential) to get your form assessed

    Intermediate (Months 2–6): Add Load Progressively

    • Add small weight increments — 2.5 to 5 lbs per session on upper body lifts, 5 to 10 lbs on lower body — when you can complete all reps with clean form
    • Introduce simple programs like Starting Strength, StrongLifts 5×5, or GZCLP — all are structured around barbell movements and proven progressive overload principles
    • Add accessory work (dumbbell curls, cable rows, core work) after your main barbell lifts to address weak links

    Advanced (6+ Months): Periodize and Specialize

    • Shift from linear progression to block periodization — alternating between hypertrophy phases (higher reps, moderate load) and strength phases (lower reps, higher load)
    • Introduce competition lifts or Olympic variations if goals evolve toward sport performance
    • Prioritize deload weeks every 4–6 training weeks to prevent overreaching and maintain long-term progress

    Common Mistakes That Sabotage Barbell Progress

    Barbell training rewards consistency and technique — and punishes ego and impatience. These are the most common errors adults make, and exactly how to fix them:

    1. Skipping the Warm-Up
    Jumping straight to working sets with a cold spine and stiff hips is a fast track to a tweaked back or shoulder impingement. Fix it: spend 5–10 minutes on dynamic mobility (hip circles, thoracic rotations, band pull-aparts) and always perform 2–3 ramp-up sets before your working weight. This isn’t optional — it’s part of the session.

    2. Chasing Weight Too Fast
    Adding too much load before mastering the pattern is the most common cause of injury in beginners. It often comes from comparing yourself to someone else in the gym. Fix it: follow a structured program and let the program dictate your progressions. If a rep felt grinding or form broke down, repeat the same weight next session instead of moving up.

    3. Neglecting the Hip Hinge Pattern
    Many adults have never learned to properly hinge at the hips — they round their lower backs during deadlifts and Romanian deadlifts, putting dangerous shear force on the lumbar spine. Fix it: practice the hip hinge with a dowel rod along your spine before touching a barbell. If three points of contact (back of head, upper back, tailbone) can’t maintain contact simultaneously, the pattern isn’t ready for load.

    4. Inconsistent Training Frequency
    Lifting once a week and expecting results is like watering a plant once a month. The neuromuscular adaptations that drive early progress require more frequent stimulus. Fix it: commit to at least two full-body sessions per week, even if they’re shorter. Thirty focused minutes twice a week beats a two-hour session once a week.

    5. Ignoring Recovery
    Muscle grows during rest, not during training. Poor sleep, inadequate protein intake, and back-to-back heavy sessions without deloads will blunt progress fast. Fix it: prioritize 7–9 hours of sleep per night (National Sleep Foundation), consume 0.7–1.0 grams of protein per pound of body weight daily, and schedule one full rest day between barbell sessions.

    What to Eat to Support Barbell Training

    Barbell training places real demands on the body — and what you eat before, during, and after your sessions directly affects both performance and recovery. The Academy of Nutrition and Dietetics recommends that active adults prioritize three nutritional pillars for strength training: adequate protein, sufficient carbohydrates, and strategic meal timing.

    Protein is the non-negotiable. A 2018 meta-analysis published in the British Journal of Sports Medicine found that dietary protein supplementation significantly increased muscle mass and strength gains in adults performing resistance training, with optimal intake around 1.62 grams per kilogram of body weight per day. In practical terms, aim for 25–40 grams of protein per meal from whole food sources: chicken breast, eggs, Greek yogurt, cottage cheese, salmon, lentils, and tofu are all excellent options.

    Carbohydrates are your primary fuel for lifting sessions. Don’t skip them. Complex carbs like oats, brown rice, sweet potatoes, and whole grain bread provide steady energy and help replenish muscle glycogen after training. The USDA Dietary Guidelines recommend that 45–65% of daily calories come from carbohydrates for active adults.

    Pre-workout meal (1–2 hours before training): A combination of complex carbohydrates and moderate protein — think oatmeal with a scoop of protein powder, or a chicken and rice bowl — primes muscles for performance.

    Post-workout window (within 30–60 minutes): Aim for 20–30 grams of protein alongside carbohydrates to support muscle protein synthesis and glycogen replenishment. A protein shake with a banana, or Greek yogurt with fruit, works well for busy schedules.

    Hydration: Even mild dehydration (1–2% body weight loss) impairs muscular strength and endurance, according to research from the American College of Sports Medicine. Aim for at least half your body weight in ounces of water daily, and add an extra 16–20 oz for every hour of training.

    How Long Until You See Results — and What to Track

    Let’s be honest about timelines, because unrealistic expectations are one of the biggest reasons people quit before seeing the payoff.

    Weeks 1–3: You’ll likely notice improvements in how movements feel — better coordination, less post-session soreness, and a sense of growing confidence with the barbell. These are real adaptations, mostly neuromuscular, even if the mirror doesn’t show much yet.

    Weeks 4–8: Measurable strength gains typically emerge. Most beginners following a structured program can increase their squat and deadlift by 20–40% within the first 8 weeks — not because of dramatic muscle growth, but because of rapid nervous system efficiency gains.

    Months 2–4: This is when visible physical changes often begin for adults who are also eating adequately. Muscle definition increases, posture typically improves, and daily tasks — carrying groceries, climbing stairs, getting up from the floor — start to feel noticeably easier.

    6+ Months: Sustained barbell training over six months or more produces meaningful changes in body composition, bone density, metabolic rate, and functional strength that compound with time. Research published in Osteoporosis International found significant improvements in bone mineral density in adults who performed progressive resistance training for six months or longer.

    What to track: Keep a training log (paper or app) with your exercises, sets, reps, and weights. Also track subjective markers: sleep quality, energy levels, and how certain movements feel. Take monthly progress photos if aesthetics are a goal — visual changes are often more apparent in photos than in the mirror. Don’t rely on the scale alone; muscle weighs more than fat per volume, so body weight can stay stable even as composition improves significantly.

    When to seek professional guidance: If you experience persistent joint pain (not to be confused with normal muscle soreness), have a history of spinal injury or osteoporosis, or feel your form isn’t progressing despite consistent practice, schedule a session with a certified strength coach or physical therapist. Investing in a few professional sessions early can save months of setbacks.

    Frequently Asked Questions About Barbell Training

    Is barbell training safe for older adults?
    Absolutely — when performed with appropriate load and proper technique. Research published in the Journal of Aging and Physical Activity has shown that progressive barbell training improves muscle strength, balance, and bone density in adults over 50. The key is starting conservatively and prioritizing movement quality over the amount of weight on the bar. If you have existing joint conditions or spinal concerns, get medical clearance first.

    How is barbell training different from machine training?
    Machines guide movement along a fixed path, reducing the demand on stabilizing muscles. Barbell training requires you to control the bar through full three-dimensional movement, which recruits more muscle groups simultaneously and develops functional strength that transfers to real-world activities. Both have value, but barbells generally produce greater whole-body strength adaptation.

    Can I do barbell training at home?
    Yes. A basic home setup — a barbell, a set of weight plates, a squat rack or power cage, and an adjustable bench — is all you need to perform the foundational lifts. This is a meaningful upfront investment (typically $500–$1,500 for quality equipment), but it removes gym commute barriers and pays for itself over time. Ensure your floor can handle the load and you have adequate space and ceiling height.

    How many days per week should I train with a barbell?
    For most adults, 2–4 barbell sessions per week is the sweet spot. Beginners benefit from 3 full-body sessions weekly. More advanced lifters may split into upper/lower or push/pull/legs splits across 4 days. More is not always better — recovery is where adaptation happens, and training every day without adequate rest leads to diminishing returns and injury risk.

    Do I need a spotter for barbell training?
    For bench press and certain barbell variations, having a spotter is strongly recommended — especially when training near your maximum effort. If you train alone, use a power rack with safety bars set just below your lowest point of movement. For deadlifts and rows, a spotter isn’t necessary. Never attempt a true one-rep maximum without safety equipment or a qualified spotter present.

    Start Small, Lift Often, Think Long-Term

    Barbell training isn’t about impressing anyone at the gym or hitting an arbitrary number on the bar. It’s about building a stronger, more resilient body that shows up for you — in the gym, at work, in your daily life, and decades from now.

    The adults who benefit most from barbell training aren’t the ones who train the hardest in week one. They’re the ones who show up consistently in week two, week twelve, and week fifty-two. They start with the basics, respect the process, and let the results compound over time.

    Your action for today: pick one of the four foundational movements — squat, deadlift, bench press, or barbell row — and spend 15 minutes learning it with a lightweight or PVC pipe. That single rep starts everything. For a complete picture of how strength training fits into your broader wellness plan, also explore our guides on Calisthenics Training for Adults and Foam Rolling for Recovery and Mobility — both pair naturally with barbell work.

    This article is for informational and educational purposes only. The content is not intended to replace professional medical, nutritional, or fitness advice. Always consult a qualified healthcare provider, registered dietitian, or certified fitness professional before starting a new health program or making significant changes to your lifestyle.

    Content reviewed by our wellness editorial team, with references to peer-reviewed research and guidelines from leading health organizations.
  • Calisthenics Training for Adults: Build Strength Anywhere

    Calisthenics Training for Adults: Build Strength Anywhere

    Calisthenics Training for Adults: Build Strength Anywhere

    No gym membership, no equipment, no excuses — just your bodyweight and a plan that actually works.

    Imagine walking into a gym for the first time, looking around at the machines, the cables, the barbells — and feeling completely overwhelmed. Or maybe you’ve been a gym regular for years but just moved to a new city, and suddenly your routine is gone. Or you’re a busy parent who can’t justify a $60/month membership when the mortgage just went up. Whatever your situation, there’s a training method that’s been hiding in plain sight, one that elite military units, gymnasts, and everyday fitness enthusiasts have relied on for decades: calisthenics.

    Calisthenics training uses your own bodyweight as resistance to build real, functional strength — no equipment required. And while it might sound like a beginner-only approach, the truth is that calisthenics can challenge elite athletes just as effectively as a barbell program. A well-structured push-up progression, for example, can be scaled from a wall push-up for a complete novice to a one-arm push-up for an advanced athlete. The range is that wide.

    In this guide, you’ll learn why calisthenics deserves a serious place in your fitness routine, how the science backs it up, how to get started regardless of your current fitness level, and what to watch out for so you don’t waste months spinning your wheels. Whether you’re 25 or 55, this approach can work for you — and it might be the most sustainable fitness habit you’ve ever built.


    Why Calisthenics Matters More Than You Think

    There’s a persistent myth in fitness culture that bodyweight training is only for people who can’t afford real equipment, or that it stops being effective once you reach a certain strength level. That couldn’t be further from the truth.

    According to the American College of Sports Medicine (ACSM), resistance training — regardless of whether it uses free weights, machines, or bodyweight — produces significant improvements in muscle strength, endurance, and body composition when applied with progressive overload. The key isn’t the tool. It’s the stimulus.

    What makes calisthenics particularly powerful for adults aged 25–60 is its emphasis on functional movement patterns. When you do a squat, a push-up, or a pull-up, you’re training movements that your body uses every single day — standing up from a chair, pushing open a heavy door, pulling yourself up from the floor. These patterns translate directly to better quality of life as you age.

    Research published in the Journal of Human Kinetics found that an 8-week calisthenics program significantly improved upper body strength, core endurance, and posture among previously untrained adults — without any external weights. That’s a meaningful result from something you can do in your living room.

    Beyond the physical benefits, calisthenics is extraordinarily accessible. You can train at home, in a park, in a hotel room, or anywhere with a small amount of floor space. That accessibility removes the most common barriers to consistency: cost, commute, and schedule.


    The Science Behind Calisthenics: How It Actually Works

    Here’s where a lot of people get confused: if you’re only lifting your own bodyweight, how does the training get harder over time? The answer lies in the principle of progressive overload — and calisthenics has more levers to pull than most people realize.

    With barbells, you add weight. With calisthenics, you can:

    • Increase leverage difficulty (moving from a standard push-up to an archer push-up to a one-arm push-up)
    • Change tempo (slowing the lowering phase to increase time under tension)
    • Adjust range of motion (going deeper into a squat, adding a pause at the bottom)
    • Progress to unilateral variations (one-leg squats, single-arm rows)
    • Increase volume and density (more reps, less rest)

    This is not a limited system. It’s an incredibly deep one.

    One common myth worth busting: many people assume calisthenics can’t build muscle mass, only endurance. The science disagrees. A 2017 study published in the Journal of Strength and Conditioning Research demonstrated that bodyweight resistance training at the right intensity (working near failure, with adequate volume) produces muscle hypertrophy comparable to traditional weight training in untrained to moderately trained individuals. Muscle doesn’t know whether the resistance comes from iron or from your own body — it only knows tension and fatigue.

    What calisthenics does exceptionally well is train relative strength — how strong you are relative to your own bodyweight. This is a crucial metric for mobility, injury prevention, and athletic performance that traditional lifting sometimes neglects.

    For adults over 40 in particular, calisthenics also tends to be gentler on joints. Because the movements are natural and unloaded by external weight, the stress on tendons and cartilage is typically lower than heavy barbell squats or bench pressing, according to Mayo Clinic guidance on age-appropriate resistance training.


    How to Get Started: Practical Steps by Level

    One of the best things about calisthenics is that there’s a clear entry point for everyone. Here’s how to begin based on where you are right now.

    Beginner (0–3 months of consistent training)

    Focus on mastering the foundational movement patterns. Aim for 3 sessions per week, with at least one rest day between sessions.

    1. Incline or knee push-ups — 3 sets of 8–12 reps. Build shoulder, chest, and tricep endurance before moving to full push-ups.
    2. Bodyweight squats — 3 sets of 10–15 reps. Focus on sitting back with your hips, keeping your knees in line with your toes.
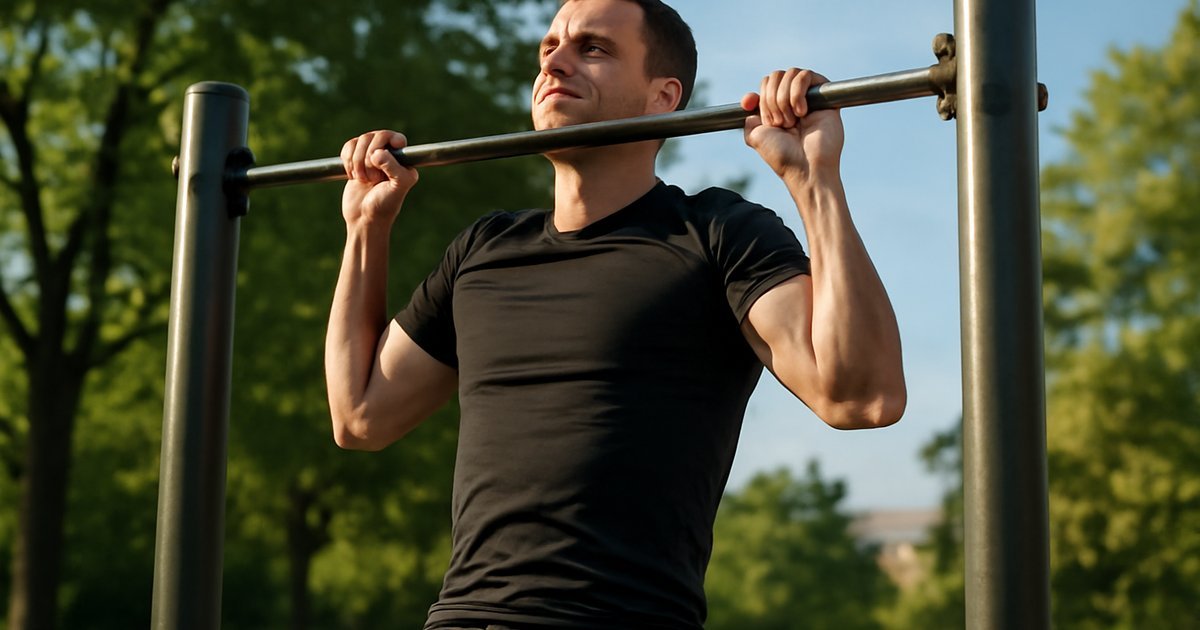
    3. Dead hangs — 3 sets of 20–30 seconds. If you have access to a pull-up bar (door-frame bars cost under $30), hanging builds grip strength and shoulder health before you attempt pulling movements.
    4. Plank holds — 3 sets of 20–40 seconds. The foundation of core training in calisthenics.
    5. Glute bridges — 3 sets of 12–15 reps. Hip extension strength is critical for posture and lower back health.

    At this stage, your goal is building a movement foundation — not pushing to failure. Consistency matters more than intensity.

    Intermediate (3–12 months)

    Once you can do 3 sets of 15 clean push-ups, 15 bodyweight squats with good form, and hold a 60-second plank, it’s time to progress.

    • Full push-ups → Diamond push-ups → Pike push-ups (toward handstand push-up progression)
    • Bodyweight squats → Bulgarian split squats → Pistol squat progressions
    • Dead hangs → Scapular pull-ups → Negative pull-ups → Full pull-ups
    • Plank → Side plank → Hollow body hold

    At this level, structure your training with an upper/lower split or a push/pull/legs approach across 4 sessions per week.

    Advanced (12+ months)

    Advanced calisthenics includes skill-based movements that require serious strength-to-weight ratio: muscle-ups, handstand push-ups, front levers, pistol squats, and human flags. These are long-term goals that require deliberate practice — and they’re genuinely impressive benchmarks of functional fitness.

    If you want to complement your calisthenics with additional cardio tools, check out our guide on Jump Rope Training for Adults — it pairs extremely well with bodyweight strength work.


    Common Mistakes That Sabotage Results

    Calisthenics looks simple on the surface, which is exactly why so many people make avoidable mistakes that slow their progress. Here are the most common ones — and exactly how to fix them.

    Mistake #1: Skipping progressions and trying to jump ahead

    It’s tempting to jump straight to pull-ups when you haven’t yet built the scapular stability and pulling strength required. The result? Shoulder impingement, elbow pain, and zero progress. Fix it by following a structured progression (like the one above) and earning each level before advancing.

    Mistake #2: Ignoring the posterior chain

    Calisthenics beginners tend to gravitate toward push-ups and squats — both involve the front of the body. Without pulling movements (rows, pull-up progressions) and hip hinges (glute bridges, single-leg deadlifts), you’ll develop muscle imbalances that lead to poor posture and back pain. Build your program around push, pull, squat, hinge, and core — every session or across a weekly split.

    Mistake #3: Treating volume as a substitute for progression

    Doing 100 push-ups a day sounds impressive, but if you’re always doing the same push-up at the same tempo, you’re training endurance — not building strength or muscle. Apply progressive overload by advancing to harder variations, slowing your reps, or adding pauses. More reps of easy movements have diminishing returns.

    Mistake #4: Neglecting recovery

    Because there’s no gym involved, it’s easy to train every day without realizing you’re overtraining. The ACSM recommends allowing 48 hours of recovery for each muscle group between sessions. If your push-up strength is declining week over week, you likely need more rest, not more training.

    Mistake #5: Not tracking progress

    Without a weight on a barbell to track, many calisthenics practitioners lose their benchmark. Keep a simple training log: record what variation you did, how many reps, and how it felt. This data tells you when to advance — and reminds you how far you’ve come.


    What to Eat to Support Your Calisthenics Training

    Calisthenics might be equipment-free, but your nutrition isn’t optional. What you eat significantly affects your energy, recovery, and the results you see from training.

    Protein is your foundation. The Academy of Nutrition and Dietetics recommends 1.2 to 2.0 grams of protein per kilogram of body weight per day for adults who engage in regular resistance training. For a 160-pound adult, that’s roughly 87 to 145 grams of protein daily. Prioritize whole food sources: eggs, chicken breast, Greek yogurt, cottage cheese, legumes, tofu, and fish.

    Carbohydrates fuel your performance. Don’t be afraid of them. The USDA Dietary Guidelines emphasize that complex carbohydrates — oats, sweet potatoes, brown rice, quinoa, fruit — should make up 45–65% of total caloric intake for most active adults. Low-carb approaches can work, but many people find their performance suffers, particularly with higher-rep calisthenics training.

    Healthy fats support hormone health and joint function. Include avocado, olive oil, fatty fish (salmon, sardines), and nuts. The American Heart Association recommends prioritizing unsaturated fats and limiting saturated fat to under 10% of daily calories.

    Hydration matters more than most people think. Even mild dehydration — as little as 2% of body weight lost in fluids — can noticeably reduce strength and endurance, according to research cited by the National Institutes of Health. Aim for at least half your bodyweight in ounces of water daily (so a 160-pound person needs 80 ounces minimum).

    Time your meals around your workouts when possible: a protein- and carb-rich meal or snack 1–2 hours before training and a protein-focused meal within 2 hours after can meaningfully support recovery and muscle protein synthesis.


    How Long Until You See Results — and What to Track

    This is the question everyone wants answered — and it deserves an honest response.

    Within 2–4 weeks, most beginners notice improved coordination, better body awareness during movements, and reduced soreness as the nervous system adapts. These neurological gains are real and meaningful, even if they don’t show up in the mirror yet.

    Within 6–8 weeks, consistent trainees typically see measurable strength gains: more reps per set, progression to harder variations, and improved endurance. Harvard Health Publishing notes that beginners can experience noticeable strength improvements within this window if training 2–4 times per week with progressive overload.

    Within 3–6 months, visible changes in muscle tone, posture, and body composition become more apparent, particularly when nutrition supports training. This timeline varies significantly based on age, starting fitness level, sleep quality, and diet consistency.

    What to track:

    • Max reps of your current benchmark movement (e.g., push-ups, pull-ups, squats)
    • Which progression level you’re working at
    • Waist circumference and how clothes fit (more reliable than scale weight alone)
    • Energy levels and sleep quality — often the first things to improve with regular exercise
    • Rest periods: if you need less rest between sets over time, that’s a sign of improved conditioning

    Seek professional guidance if you experience persistent joint pain during movements, notice no progress after 8–10 weeks of consistent effort, or have pre-existing conditions that might affect your training approach.

    For additional recovery support between sessions, our guide on Foam Rolling for Adults is an excellent complement to any calisthenics program.


    Frequently Asked Questions

    Can calisthenics build muscle, or is it just for endurance?
    Yes, calisthenics can build muscle — but only if you apply progressive overload. Doing the same easy push-ups forever won’t stimulate hypertrophy. Advance to harder variations, increase time under tension, and train close to muscular failure. Research confirms that bodyweight training at appropriate intensities produces comparable muscle growth to traditional weight training in most untrained individuals.

    Do I need any equipment to start calisthenics?
    For a beginner, you need almost nothing — a floor and your body. A doorframe pull-up bar (roughly $20–$30) opens up the entire pulling movement category, which is important for balanced training. Parallette bars and gymnastic rings become useful at intermediate and advanced levels but are not necessary to begin.

    Is calisthenics safe for people over 50?
    Generally, yes — and it’s often recommended for adults over 50 because it avoids excessive joint loading from heavy external weights. Start with beginner-level progressions, prioritize form over intensity, and increase difficulty gradually. As always, consult your healthcare provider before beginning a new exercise program, especially if you have existing joint conditions or cardiovascular concerns.

    How does calisthenics compare to going to the gym?
    Both approaches can build strength, improve body composition, and support long-term health. Calisthenics has the advantage of accessibility, lower cost, and functional movement patterns. Gyms offer more options for heavy loading and targeted muscle isolation. Many fitness enthusiasts combine both — using calisthenics on days they can’t get to the gym, or as their primary method with occasional gym sessions for variety.

    How many days per week should I train calisthenics?
    The ACSM recommends adults perform resistance training at least 2 days per week, targeting all major muscle groups. Most effective calisthenics programs run 3–5 days per week, depending on training split and recovery capacity. Beginners should start with 3 full-body sessions per week before advancing to more frequent training.


    Start Where You Are — and Build from There

    Calisthenics isn’t a trend. It’s one of the oldest and most effective forms of physical training in human history — and it works precisely because it meets you exactly where you are. You don’t need to be fit to start. You don’t need a gym, a trainer, or expensive gear. You need a plan, consistency, and the willingness to progress over time.

    Small, deliberate steps taken week after week will outperform any intense program you abandon after two weeks. Start with one session this week. Master one movement pattern. Add one progression when you’re ready. That’s how lasting fitness is built — not in one dramatic overhaul, but in steady, repeated effort.

    If you’re looking for ways to add more variety to your training routine, our guide on Outdoor Fitness Training for Adults offers excellent ideas to complement your calisthenics practice in fresh air and natural settings.

    Your bodyweight is enough. You are enough. Start today.


    Wellness Disclaimer: This article is for informational and educational purposes only. The content is not intended to replace professional medical, nutritional, or fitness advice. Always consult a qualified healthcare provider, registered dietitian, or certified fitness professional before starting a new health program or making significant changes to your lifestyle.

    Content reviewed by our wellness editorial team, with references to peer-reviewed research and guidelines from leading health organizations.

  • Battle Rope Training for Adults: Power, Cardio & Results

    Battle Rope Training for Adults: Power, Cardio & Results

    Battle Rope Training for Adults: Power, Cardio & Results

    If you’ve ever watched someone slam those thick ropes at the gym and thought, "That looks intense but I could never do that" — this guide is your sign to think again.

    Introduction

    Picture this: it’s 6:30 a.m., you’ve got 20 minutes before the school run, the commute, or the first Zoom call of the day. You need a workout that actually does something — not just checks a box. Battle rope training might be exactly what you’ve been missing.

    This isn’t just a gym aesthetic trend. Battle ropes are one of the most time-efficient, full-body training tools available — and yet they’re massively underutilized by everyday adults who assume they’re only for elite athletes or CrossFit devotees.

    The truth? Battle rope training is scalable, joint-friendly, and remarkably effective for building cardiovascular endurance, muscular strength, and even mental toughness — all at once. Whether you’re 28 or 58, a total beginner or a seasoned gym-goer looking to shake up your routine, this guide breaks down exactly how to get started, what the science says, and how to avoid the most common mistakes that keep people from seeing real results.

    By the end of this article, you’ll know why battle rope training deserves a permanent place in your weekly routine — and how to make it work for your schedule, your fitness level, and your goals.

    Why Battle Rope Training Matters More Than You Think

    Most cardio tools work your lower body hard and leave your upper body largely along for the ride. Battle ropes flip that script. Every wave, slam, and spiral demands coordinated effort from your shoulders, arms, core, and legs — simultaneously.

    According to research published in the Journal of Strength and Conditioning Research, a 10-minute battle rope session can elevate heart rate to over 85% of maximum — comparable to high-intensity interval training — while also recruiting major muscle groups across the entire body. That’s a significant metabolic demand in a very short window.

    For adults in the 25–60 age range, this matters on multiple levels. As we age, we naturally lose both cardiovascular capacity and lean muscle mass — a process called sarcopenia. Battle rope training addresses both simultaneously, which makes it uniquely valuable compared to single-mode exercises like jogging or bicep curls.

    There’s also a practical angle. The American College of Sports Medicine (ACSM) recommends at least 150 minutes of moderate-intensity or 75 minutes of vigorous-intensity aerobic activity per week, plus muscle-strengthening activities on two or more days. Battle rope training can contribute meaningfully to both categories in a single session — a significant advantage for time-pressed adults.

    And perhaps most underrated: the low joint-impact nature of the movement. Unlike running or jumping, battle ropes allow you to train at high intensity without the repetitive ground-impact stress on your knees, hips, and ankles.

    The Science Behind Battle Rope Training: How It Actually Works

    Battle ropes — typically 1.5- to 2-inch thick, 30 to 50 feet long — work through a principle called undulation resistance. When you create waves, slams, or spirals with the rope, you’re generating and sustaining tension that your muscles must continuously resist and redirect. It’s not a static load like a barbell — it’s a dynamic, unpredictable resistance that forces your stabilizer muscles to stay engaged throughout every rep.

    A study published in PLOS ONE found that battle rope training produces a significantly higher oxygen consumption rate than many traditional resistance exercises, with metabolic equivalents (METs) ranging from 8 to 11 depending on the exercise variant and intensity. For context, jogging at a moderate pace sits around 7 METs. This means battle ropes can deliver a vigorous metabolic challenge without requiring you to leave the spot you’re standing.

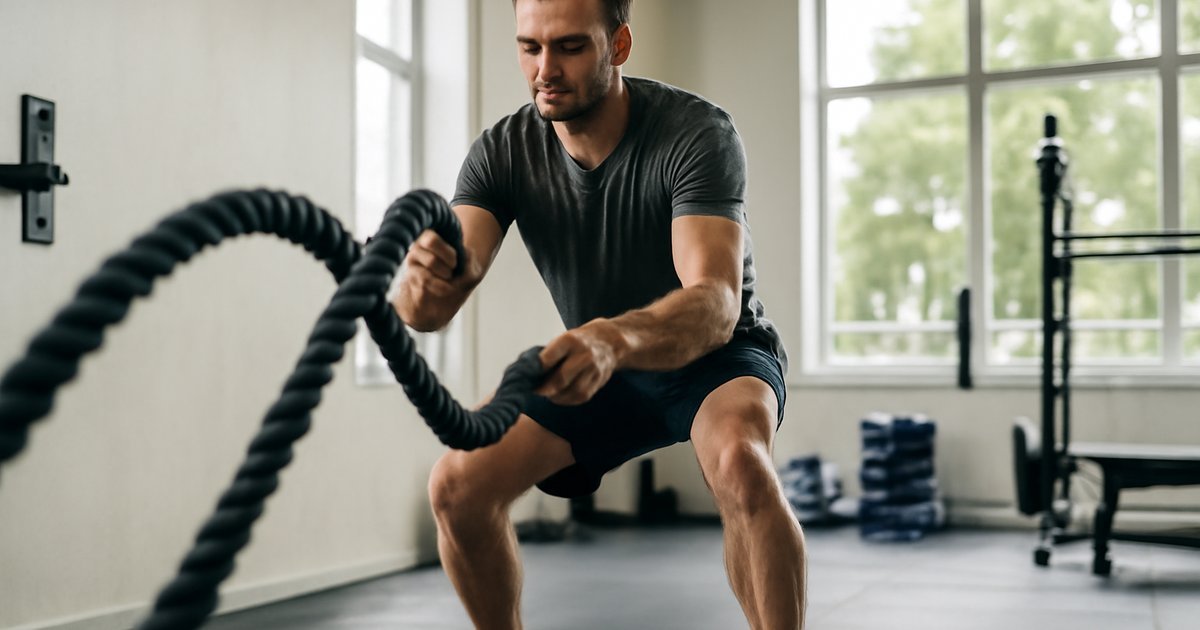
    Common myth busted: Many people assume battle rope workouts are only about upper body. That’s inaccurate. Every effective battle rope exercise demands a stable, powerful base — which means your glutes, quads, hamstrings, and calves are actively working throughout. Certain moves like the lateral shuffle with waves or squat slams make the lower body the primary driver. Battle ropes are a full-body system, not an arm workout with a fancy prop.

    From a hormonal perspective, the combination of muscular effort and cardiovascular intensity triggers a meaningful release of catecholamines (epinephrine and norepinephrine) and growth hormone — both of which play roles in fat metabolism and muscle repair. Harvard Health Publishing notes that high-intensity resistance-style training like battle ropes may support improvements in body composition over time, though individual results vary based on diet, recovery, and baseline fitness.

    How to Get Started with Battle Rope Training: Practical Steps

    Starting battle rope training doesn’t require a gym membership — though having a solid anchor point is essential. Here’s how to build in smartly, regardless of your current fitness level.

    Step 1: Set Up Your Equipment
    A standard beginner setup is a 30-foot rope anchored to a wall mount, a squat rack post, or a heavy dumbbell on the floor. Stand far enough back that the rope has slight tension but isn’t taut. Your feet should be shoulder-width apart, knees slightly bent, core braced.

    Step 2: Start with Beginner Movements

    • Alternating waves: Move each arm up and down in an alternating pattern, keeping the wave consistent. Start with 20–30 seconds on, 40–60 seconds rest. This builds rhythm and shoulder endurance.
    • Double-arm waves: Both arms move simultaneously. More demanding on the core and shoulders. Start with 15–20 seconds.
    • Rope slams: Raise both arms overhead and slam the rope down with force. Great for power and stress relief. 8–10 reps per set.

    Step 3: Build a Beginner Session (10–15 Minutes)

    1. 2-minute warm-up: light jumping jacks or arm circles
    2. 3 rounds of: 30 sec alternating waves / 30 sec rest
    3. 3 rounds of: 20 sec double waves / 40 sec rest
    4. 2 rounds of: 10 rope slams / 30 sec rest
    5. 2-minute cool-down: wrist circles, shoulder rolls, chest stretch

    Intermediate Options:
    Once you can complete the beginner session with good form and controlled breathing, introduce lateral shuffles with waves, squat-to-waves, or single-arm spirals. Shorten rest intervals to 20 seconds and extend work intervals to 40–45 seconds.

    Advanced Options:
    For experienced exercisers, tabata-style battle rope circuits (20 sec work / 10 sec rest x 8 rounds) are highly effective. You can also combine battle ropes with partner drills, resistance bands, or incorporate them into a larger circuit. If you’re interested in combining high-intensity formats, our guide on Tabata Training for Adults covers the method in depth.

    Common Mistakes That Sabotage Battle Rope Results

    Battle ropes look simple — and that’s exactly why most beginners make the same set of avoidable errors. Here are the most common ones and how to fix them.

    Mistake 1: Using Only Your Arms
    This is the number one error. When your arms fatigue quickly and the waves look weak within 10 seconds, your lower body isn’t doing its job. Fix it by sitting into a slight squat position, pressing the floor with your feet, and initiating movement from your hips and core. Your arms are transmission — not the engine.

    Mistake 2: Gripping Too Hard
    Death-gripping the rope leads to forearm fatigue and reduced wave quality. You want a firm but relaxed grip — think of holding a slightly squeezed stress ball, not wringing out a towel. This also protects your wrist joints over time.

    Mistake 3: Resting Too Long Between Intervals
    Taking 2–3 minutes of passive rest between 15-second efforts defeats the metabolic purpose. The cardiovascular benefit of battle rope training comes from the cumulative intensity. Follow the structured work-to-rest ratios above. As you progress, the goal is to shorten rest, not eliminate it — proper recovery between intervals is still necessary for quality output.

    Mistake 4: Ignoring Posture Under Fatigue
    As the session gets harder, many people round forward, drop their chin, and lose their core brace. This creates unnecessary spinal load and reduces power transfer. Set a rule: if your form breaks, rest for 10 seconds and reset. Quality reps beat sloppy volume every time.

    Mistake 5: Going All-Out From Day One
    Battle ropes are deceptively demanding. Many beginners push maximum effort in the first session and end up too sore to train for days. Start at 60–70% intensity and build over 2–3 weeks. Your tendons, shoulders, and forearms need time to adapt to this type of loading.

    What to Eat to Support Battle Rope Training

    Battle rope sessions are metabolically demanding, and your nutrition should reflect that — before and after training.

    Pre-workout (60–90 minutes before):
    Aim for a small, balanced meal with easily digestible carbohydrates and moderate protein. Good options include oatmeal with a banana and a tablespoon of almond butter, or whole-grain toast with two eggs. The carbohydrates fuel the high-intensity output; the protein primes muscle repair.

    The Academy of Nutrition and Dietetics recommends 20–40 grams of protein within 2 hours after resistance-style exercise to support muscle protein synthesis. For a 150-pound adult, this translates to roughly 0.7–1 gram of protein per pound of body weight per day if you’re training consistently.

    Post-workout:
    Prioritize protein and complex carbohydrates. Practical post-battle-rope meals include Greek yogurt with berries and granola, a chicken or turkey wrap on a whole-grain tortilla, or a smoothie with whey or plant-based protein, spinach, and frozen fruit.

    Hydration:
    The National Institutes of Health (NIH) notes that even mild dehydration (1–2% of body weight) can meaningfully impair physical performance and cognitive function. For battle rope sessions, drink 16–20 oz of water in the 2 hours before training, sip during if the session exceeds 20 minutes, and rehydrate within 30 minutes of finishing.

    What to limit:
    Heavy fat or fiber-rich meals immediately before training can cause GI distress during high-intensity efforts. Avoid fried foods, large salads, or anything high in saturated fat within 60 minutes of a session. Alcohol the night before is also worth minimizing — it impairs neuromuscular coordination, which affects wave quality and injury risk.

    How Long Until You See Results — and What to Track

    This varies meaningfully based on your baseline fitness, training frequency, and nutrition. That said, here’s a realistic, research-informed timeline for most adults starting from a moderate fitness level.

    Weeks 1–2: Expect soreness, particularly in the shoulders, forearms, and core. You’ll also notice improved breathing efficiency within your sessions and greater grip endurance. This is adaptation — it’s working.

    Weeks 3–5: Wave quality improves, form becomes more automatic, and you’ll likely notice your rest intervals feeling less necessary. Many beginners report improved posture and reduced shoulder tightness during this phase.

    Weeks 6–10: Measurable changes in cardiovascular endurance are typical. If combined with appropriate nutrition, improvements in body composition may begin to show — though this depends heavily on factors outside of training. Research in the Journal of Human Kinetics found that 6 weeks of battle rope training 3 times per week produced significant improvements in aerobic capacity and muscular endurance in previously active adults.

    What to track:

    • How long you can sustain waves at a given intensity (endurance marker)
    • Resting heart rate over time (cardiovascular fitness indicator)
    • Recovery time between intervals
    • Grip endurance — when your forearms stop failing you first
    • Perceived effort at the same workload (should feel easier over weeks)

    If you’re combining battle rope training with a broader program, pairing it with structured cardio like outdoor fitness training or incorporating active recovery like foam rolling can support faster adaptation. Our guide on Foam Rolling for Adults is a practical complement to high-intensity days.

    When to reassess:
    If after 8 weeks of consistent 2–3x weekly training you notice no improvement in endurance, energy, or form, it may be worth reviewing your recovery, sleep quality, or nutrition — or consulting a certified personal trainer for a program audit.

    Frequently Asked Questions

    Q: Can I do battle rope training if I have shoulder issues?
    It depends on the nature of your shoulder condition. Mild tightness or past injury that has healed may actually improve with the dynamic, low-impact motion of battle ropes — but anyone with active rotator cuff tears, impingement, or recent surgery should consult a physical therapist before starting. Modifications like underhanded grips or lower amplitude waves can reduce shoulder stress in many cases.

    Q: How heavy are battle ropes, and do I need to buy my own?
    Most commercial battle ropes weigh between 25 and 50 pounds depending on length and thickness. For home use, a 30-foot, 1.5-inch rope (around 20–25 lbs) is a solid starting point. Many gyms and athletic centers carry them — check before purchasing. A quality rope typically costs $60–$120 and lasts for years with minimal maintenance.

    Q: Is battle rope training good for weight loss?
    It can contribute meaningfully to a calorie deficit when combined with appropriate nutrition. The high-intensity nature of battle rope work burns a significant number of calories relative to time — some estimates suggest 300–400 calories per 30-minute session depending on intensity and body weight. However, no single exercise guarantees weight loss without dietary alignment. Results vary significantly.

    Q: How many days per week should I train with battle ropes?
    For most adults, 2–3 sessions per week is effective and sustainable. Because of the muscular and cardiovascular demand, consecutive daily sessions are not recommended for beginners. Allow at least one rest or active recovery day between sessions to support tissue adaptation and avoid overuse strain.

    Q: Can older adults (50+) do battle rope training?
    Absolutely — with appropriate modifications. The low-impact nature makes battle ropes accessible for adults over 50 who want high-intensity effort without joint stress. Shorter intervals, longer rest periods, and lighter ropes are sensible starting adjustments. The Mayo Clinic supports high-intensity resistance training for healthy older adults as a means of preserving muscle mass and functional capacity.

    Conclusion

    Battle rope training checks a lot of boxes that are hard to fill with a single tool: cardiovascular intensity, full-body muscle engagement, low joint impact, and genuine scalability from beginner to advanced. It’s not a gimmick — it’s a well-studied, practically versatile method that works for real people with real schedules.

    You don’t need to be an athlete. You don’t need an hour. You need 15–20 minutes, a decent anchor, and the willingness to show up consistently. Small, purposeful sessions compound over weeks into real, measurable results.

    Start this week. Pick two alternating wave sets. Time 30 seconds. Rest. Repeat. That’s the beginning of something that could meaningfully change how you feel, move, and recover — for years to come.


    This article is for informational and educational purposes only. The content is not intended to replace professional medical, nutritional, or fitness advice. Always consult a qualified healthcare provider, registered dietitian, or certified fitness professional before starting a new health program or making significant changes to your lifestyle.

    Content reviewed by our wellness editorial team, with references to peer-reviewed research and guidelines from leading health organizations.

  • Speed Training for Adults: Run Faster and Move Better

    Speed Training for Adults: Run Faster and Move Better

    Speed Training for Adults: Run Faster and Move Better

    You don’t have to be an athlete to train like one — and your body will thank you for it.

    Remember the last time you had to sprint across a parking lot to catch your car before the meter ran out, or chase after a dog that slipped the leash? If that ten-second dash left you winded and sore the next day, you’re not alone — and you’re exactly who this article is written for.

    Speed training is one of the most overlooked fitness tools for adults who aren’t competitive athletes. Most people assume it’s reserved for track stars or football players. But the truth is, training your body to move faster has profound benefits for everyday adults — from better cardiovascular health and stronger legs to improved reaction time and even fall prevention as you age.

    This guide breaks down speed training in a way that’s practical, safe, and genuinely effective for adults aged 25 to 60. Whether you’re starting from a walk-jog baseline or you’re already a recreational runner looking to push your pace, you’ll find a clear, science-backed path forward. By the end, you’ll understand how speed training works, how to start without getting injured, and what to realistically expect along the way.

    Why Speed Training Matters More Than You Think

    When most people think about adult fitness goals, they think about losing weight, building muscle, or improving endurance. Speed rarely makes the list. But that’s a missed opportunity — because training for speed activates physiological systems that slower, steady-state workouts often can’t reach.

    Speed work recruits fast-twitch muscle fibers — the type responsible for explosive, powerful movements. According to the American College of Sports Medicine (ACSM), adults naturally begin losing fast-twitch muscle fiber density after age 30, a process that accelerates without targeted training. This loss contributes to reduced power output, slower reaction times, and increased injury risk during everyday activities.

    A landmark study published in the Journal of Strength and Conditioning Research found that adults who incorporated sprint-interval training twice a week for eight weeks showed significant improvements in both neuromuscular coordination and cardiovascular efficiency — gains that traditional moderate-intensity cardio alone didn’t produce to the same degree.

    Beyond athletic performance, there’s a longevity argument. Research from the Mayo Clinic suggests that maintaining leg power and speed capacity is one of the strongest predictors of functional independence in later decades of life. In other words, the ability to move quickly isn’t just about sports — it’s about staying capable and injury-resistant as you age.

    How Speed Training Actually Works

    Speed is not just about how fast your legs move. It’s a combination of stride length, stride frequency, neuromuscular efficiency, and energy system capacity. Understanding this helps you train smarter — and bust one of the biggest myths in the process.

    The myth: Speed is purely genetic. Either you’re fast or you’re not.
    The reality: While genetics play a role in your ceiling, most adults have significant untapped speed potential that responds very well to consistent training.

    Speed training works by stressing the body’s phosphocreatine and anaerobic glycolysis energy systems — the fast-burning fuel systems activated during high-intensity bursts lasting between two and thirty seconds. Repeated exposure to these short, intense efforts improves the muscles’ ability to generate force quickly and the nervous system’s ability to recruit more muscle fibers simultaneously.

    A 2022 study published in PLOS ONE demonstrated that structured acceleration drills — short sprints of 10 to 40 meters — improved ground contact time and running economy in recreational adult runners within just six weeks. The key wasn’t training longer; it was training at higher intensities for shorter durations, with adequate rest between efforts.

    This is also why recovery is built into every speed session. Unlike endurance runs where you’re working continuously, speed training operates on a work-to-rest ratio — typically 1:3 to 1:5 for beginners. Your muscles and nervous system need that rest to perform each effort at maximal or near-maximal intensity. Skipping rest doesn’t make the session harder in a productive way — it just turns it into tired jogging.

    How to Get Started: Practical Steps for Every Level

    Before your first speed session, there’s one non-negotiable: a proper warm-up. Cold muscles and explosive movement are a recipe for a hamstring pull. Give yourself at least 10 minutes of light jogging, dynamic leg swings, high knees, and hip circles before any fast work.

    Beginner Level (0-6 months of consistent exercise)

    • Start with stride-outs: On a flat surface, gradually accelerate to about 80% of your maximum effort over 40-60 meters, then decelerate. These are not full sprints — they’re controlled accelerations that teach your body fast movement patterns without overloading tissues. Do 4-6 reps, walking back to the start each time.
    • Frequency: Once per week. Speed work is taxing. One session weekly is enough to stimulate adaptation at this stage.
    • Rest between reps: 60-90 seconds of walking rest minimum.
    • Focus on form: Drive your arms forward and back (not across your body), keep your torso upright, and land on the mid-foot — not the heel.

    Intermediate Level (6+ months of consistent training, some running base)

    • Add hill sprints: Find a moderate incline (5-8% grade). Sprint uphill for 8-12 seconds, walk back down. Start with 6 reps and build to 10 over 4-6 weeks. Hill sprints reduce impact stress compared to flat sprints while forcing maximal effort.
    • Introduce flying 20s: Jog 20 meters to build momentum, then sprint at full effort for 20 meters. This trains top-end speed with less wear on the Achilles and hamstrings than standing starts.
    • Frequency: 1-2 times per week, never on consecutive days.

    Advanced Level (Regular runner or athlete with 1+ year of training)

    • Incorporate 100-200 meter repeats at 90-95% effort with 3-4 minutes rest between sets.
    • Add speed endurance work: 4-6 reps of 200 meters at hard but sustainable pace, 90 seconds rest.
    • Consider pairing speed sessions with outdoor fitness training to develop contextual speed across varied terrain.

    Common Mistakes That Sabotage Your Speed Gains

    Speed training has a steeper learning curve than most fitness modalities — and the margin for error is smaller. These are the mistakes people make most often, and how to correct them.

    1. Skipping the warm-up or shortening it.
    This is the fastest route to a pulled muscle. The hamstrings and hip flexors are especially vulnerable during explosive movements when they haven’t been properly prepared. Never skip your 8-10 minute dynamic warm-up, no matter how pressed for time you are. If you only have 20 minutes total, do 10 minutes of warm-up and 10 minutes of actual work.

    2. Doing speed work on tired legs.
    Many adults schedule speed sessions after a heavy strength day or at the end of a long week. Speed requires fresh neuromuscular output. If your legs are fatigued, you won’t hit the intensities needed to actually train speed — and your form breaks down, raising injury risk. Schedule speed sessions at the start of the week or after a full rest day.

    3. Going 100% too soon.
    Maximal sprinting places enormous stress on the hamstrings, Achilles tendon, and calves. Jumping from no speed work to full-effort 100-meter sprints is one of the most common causes of adult hamstring strains. Build to maximal intensity over 4-6 weeks, starting at 70-80% effort and progressing gradually.

    4. Neglecting recovery between sessions.
    Speed adaptations happen during rest, not during the workout itself. Two speed sessions back-to-back with no recovery day in between will stall progress and increase injury risk. Pair your speed days with light recovery work — foam rolling, walking, or mobility drills. For guidance on optimizing your recovery, check out this resource on foam rolling for adults.

    5. Ignoring running mechanics.
    Sloppy form doesn’t just limit speed — it creates repetitive stress patterns that lead to overuse injuries. If you’re serious about speed training, consider one or two sessions with a certified running coach to assess your gait and arm drive.

    What to Eat to Support Speed Training

    Speed training is fueled differently than endurance work. Your body primarily relies on carbohydrates — specifically muscle glycogen — during high-intensity sprint efforts. This makes your pre-workout nutrition critical.

    The Academy of Nutrition and Dietetics recommends consuming a moderate-carbohydrate meal 2-3 hours before a speed session, or a light carbohydrate snack (such as a banana or toast with honey) 30-60 minutes before training. Showing up to a speed session glycogen-depleted is like trying to run a high-performance engine on an empty tank.

    Key nutrients for speed athletes and adults:

    • Carbohydrates: Oats, sweet potatoes, whole grain bread, rice — aim for 45-65% of daily calories from quality carbs (USDA Dietary Guidelines).
    • Protein: Essential for repairing the fast-twitch muscle fibers stressed during sprinting. Target 1.2-1.6 grams per kilogram of body weight daily, per ACSM guidelines. Good sources include eggs, Greek yogurt, chicken, fish, and legumes.
    • Creatine monohydrate: One of the most studied and evidence-backed supplements for supporting short-burst, high-intensity performance. Research published in the Journal of the International Society of Sports Nutrition confirms its effectiveness for explosive activities — results vary individually, and it’s best to discuss with a healthcare provider first.
    • Hydration: Even mild dehydration impairs neuromuscular performance. Aim for pale yellow urine as a hydration gauge. Drink 16 oz of water 1-2 hours before training.
    • What to limit before speed sessions: Heavy fats, excessive fiber, and large meals within 90 minutes of training — these can cause GI distress during high-effort bursts.

    How Long Until You See Results — and What to Track

    Realistic expectations matter. Many adults start speed training and expect dramatic changes in two weeks. Here’s what the research actually shows:

    Weeks 1-3: Primarily neuromuscular adaptation. Your brain is learning to recruit muscle fibers more efficiently. You may not feel dramatically faster yet, but coordination and form are improving. Fatigue after sessions may be surprisingly high.

    Weeks 4-6: Measurable speed improvements begin. Most adults notice a reduction in time over set distances (a 40-yard dash, a 100-meter stretch). Cardiovascular recovery between reps also improves noticeably.

    Weeks 8-12: Structural adaptations set in — greater muscle power output, improved stride mechanics, and often enhanced performance in other fitness areas like cycling, jump rope, or metabolic conditioning. Research from the British Journal of Sports Medicine confirms that 8-12 weeks of structured sprint training produces meaningful aerobic and anaerobic gains in recreational adult athletes.

    What to track:

    • Time over a fixed distance (40 meters, 100 meters) — test every 4 weeks
    • Number of reps completed at target effort without form breakdown
    • Heart rate recovery time between sprint efforts (should improve over weeks)
    • Subjective energy and muscle soreness levels in the 24-48 hours post-session

    If after 10-12 consistent weeks you’re seeing no improvement, it may be time to reassess your programming, recovery quality, or nutrition — or consult a certified running coach or sports medicine professional.

    For those who enjoy pairing speed work with other high-intensity formats, Tabata training can be an excellent complement to your speed development program.

    Frequently Asked Questions

    Is speed training safe for adults over 50?
    Yes — with proper progression and warm-up, speed training is appropriate and beneficial for most adults over 50. The key is starting conservatively: begin with stride-outs at 70-80% effort rather than full sprints, prioritize warm-up and recovery, and increase intensity gradually over several weeks. Anyone with cardiovascular conditions or joint issues should consult a physician first.

    How often should adults do speed training per week?
    For most adults, one to two sessions per week is sufficient and sustainable. Speed work is neurologically demanding — too many sessions without adequate recovery leads to diminishing returns and increased injury risk. More is not better here; quality and recovery matter more than volume.

    Can I do speed training if I’m not a runner?
    Absolutely. Speed training principles apply to cycling sprints, agility ladder drills, swimming intervals, and even battle rope exercises. The sport-specific application varies, but the underlying physiology — training fast-twitch fibers and the anaerobic energy system — is universal across activities.

    Will speed training help me lose weight?
    It can contribute meaningfully. High-intensity sprint work elevates post-exercise oxygen consumption (EPOC), meaning your body continues burning more calories for hours after the session ends. However, results vary significantly based on diet, sleep, total weekly activity, and individual metabolism. Speed training works best as part of a comprehensive wellness approach — not as a standalone weight-loss strategy.

    What’s the difference between speed training and HIIT?
    There’s overlap, but they’re not the same. HIIT (High-Intensity Interval Training) refers broadly to any workout alternating high and low intensity efforts and can include cycling, rowing, or bodyweight circuits. Speed training specifically focuses on developing velocity, stride mechanics, and neuromuscular explosive capacity — usually through running or sprinting-based drills. HIIT can include speed elements, but speed training has a more specific structural and mechanical focus.

    Start Moving Faster — One Session at a Time

    Speed training isn’t just for athletes on a track. It’s a legitimate, evidence-backed tool for any adult who wants to feel more powerful, move more efficiently, and protect their physical capability well into their 50s, 60s, and beyond.

    You don’t need a fancy facility or a coaching team. You need a flat surface, proper footwear, 30-40 minutes twice a week, and the patience to build progressively. Start with stride-outs. Add hill sprints after a month. Track your times every four weeks and watch the numbers shift.

    Small, consistent speed sessions add up to real changes in how your body moves, feels, and performs. The best time to start was last month. The second-best time is your next rest day.

    This article is for informational and educational purposes only. The content is not intended to replace professional medical, nutritional, or fitness advice. Always consult a qualified healthcare provider, registered dietitian, or certified fitness professional before starting a new health program or making significant changes to your lifestyle.

    Content reviewed by our wellness editorial team, with references to peer-reviewed research and guidelines from leading health organizations.

  • Sandbag Training for Adults: Build Real-World Strength

    Sandbag Training for Adults: Build Real-World Strength

    Sandbag Training for Adults: Build Real-World Strength

    If you’ve ever struggled to carry groceries, move furniture, or keep up with kids — sandbag training might be the functional fitness fix you didn’t know you needed.

    Picture this: you’re at the gym, lifting perfectly balanced barbells in perfectly controlled conditions — and then real life happens. You need to haul a heavy bag of mulch across your yard, or wrestle a suitcase into an overhead bin, or pick up a squirming toddler mid-tantrum. Suddenly, that polished gym strength doesn’t feel so transferable.

    That’s exactly where sandbag training comes in. Once a tool reserved for military conditioning and combat sports, sandbag workouts have made a serious comeback in mainstream fitness — and for good reason. The shifting, unpredictable load inside a sandbag forces your entire body to stabilize, adapt, and work harder than it would with a fixed-weight dumbbell or barbell.

    In this guide, you’ll learn how sandbag training works, why it’s particularly effective for adults aged 25 to 60, how to start safely, and exactly what mistakes to avoid. Whether you’re a complete beginner or a seasoned lifter looking for a new challenge, there’s something here for you.

    Why Sandbag Training Matters More Than You Think

    Most gym equipment is engineered to be stable, predictable, and easy to grip. That’s great for isolating muscles — but it’s not how the real world works. Real-world loads shift, sag, and throw off your center of gravity. That’s the unique challenge that makes sandbag training so valuable.

    According to the American College of Sports Medicine (ACSM), functional training — exercises that mimic real-life movement patterns — significantly improves balance, coordination, and injury resilience across all age groups. Sandbag training checks every box of functional fitness: it demands multi-joint effort, engages stabilizer muscles, and builds grip strength that machines simply can’t replicate.

    For adults in the 30-to-60 age range especially, this matters deeply. Research published in the Journal of Strength and Conditioning Research found that unstable load training (like sandbags) activates significantly more trunk musculature than stable resistance training at the same weight. That means more core engagement, better posture support, and stronger movement mechanics — with every single rep.

    Beyond raw strength, sandbag training also supports cardiovascular fitness. Because you’re engaging more muscles simultaneously and fighting to stabilize the load, your heart rate climbs quickly — turning a strength workout into metabolic conditioning without a single treadmill in sight.

    The Science Behind How Sandbag Training Actually Works

    Here’s the key concept: sandbags create what sports scientists call an unstable load. Unlike a 30-pound dumbbell — which is rigid and predictable — a 30-pound sandbag shifts its weight internally as you move it. The sand settles, sloshes, and redistributes, forcing your neuromuscular system to constantly recalibrate.

    This dynamic instability recruits smaller stabilizer muscles that rarely get trained with traditional equipment. Your rotator cuff, deep spinal stabilizers, hip abductors, and forearm flexors all have to engage just to control the bag — before you even count the primary muscle groups doing the lifting.

    A common myth is that sandbag training is "just for athletes" or that you need to be already fit to use one. That’s simply not true. Because sandbags come in adjustable fill levels — from 10 pounds all the way to 150-plus — they’re accessible to beginners and challenging to elite lifters simultaneously. You don’t need a gym membership, a power rack, or any specialized knowledge to get started.

    Research from the National Strength and Conditioning Association (NSCA) also highlights that grip-intensive training, a hallmark of sandbag work, correlates strongly with overall functional longevity — meaning stronger grip strength is associated with better health outcomes as you age. One large-scale study published in JAMA Internal Medicine found that grip strength is a reliable predictor of cardiovascular health and all-cause mortality in adults over 35.

    The bottom line: sandbag training isn’t a gimmick. It’s physics applied to fitness — and the results show up in your body and your daily life.

    How to Get Started With Sandbag Training

    The good news: you don’t need a lot. A quality training sandbag (available from brands like GORUCK, Rogue, or Brute Force), an open space, and about 30 minutes are all it takes to get a full-body workout.

    Step 1: Choose the right starting weight.
    For most beginners, a 20-to-30-pound sandbag is an appropriate starting point for women, and 30-to-50 pounds for men. Don’t let ego drive this — the shifting load will humble you fast, even at moderate weights.

    Step 2: Start with foundational movements.
    Begin with the four pillars of sandbag training before adding complexity:

    • Deadlift: Hinge at the hips, grab the sandbag by the handles or fabric loops, and stand tall. Focus on a neutral spine.
    • Bear hug carry: Wrap both arms around the bag and walk for 30-50 meters. Builds core stability and grip endurance.
    • Shoulder load: Lift the bag onto one shoulder and hold or walk. Challenges anti-lateral flexion strength.
    • Squat: Hold the bag at chest level (zercher position) or on your shoulder and perform slow, controlled squats.

    Step 3: Build a simple beginner session (3x per week).

    • Sandbag deadlift — 3 sets of 10 reps
    • Bear hug carry — 3 rounds of 40 meters
    • Shoulder squat (alternating sides) — 3 sets of 8 per side
    • Overhead press (use handles) — 3 sets of 10 reps
    • Bent-over row — 3 sets of 10 reps

    Intermediate and advanced options: Once the basics feel solid, add Turkish get-ups, sandbag cleans, rotational lunges, and loaded carries with time or distance challenges. You can also increase intensity by shortening rest periods rather than always adding more weight — a strategy endorsed by the ACSM for building both strength and cardiovascular endurance.

    Common Mistakes That Sabotage Sandbag Training Results

    Sandbag training is intuitive — but that doesn’t mean it’s mistake-proof. These are the most common errors adults make when starting out, and how to correct each one.

    Mistake 1: Going too heavy, too soon.
    Because sandbags feel awkward rather than simply heavy, many people underestimate how much demand they place on stabilizer muscles and the lower back. Starting with too much weight leads to form breakdown, back strain, and discouragement. Fix: begin conservatively and master the movement patterns before increasing the load.

    Mistake 2: Ignoring grip position and bag handling.
    Grabbing a sandbag incorrectly — especially without handles — can put excessive strain on the wrists and forearms. Fix: Use a bag with reinforced handles when starting out, and learn proper grip mechanics before transitioning to handleless training.

    Mistake 3: Skipping the warm-up.
    Sandbag exercises heavily recruit the hips, lower back, and shoulders — areas that need proper preparation. Jumping straight into heavy carries or cleans without warming up significantly raises injury risk. Fix: spend 5-8 minutes on dynamic mobility — hip circles, thoracic rotations, shoulder rolls, and bodyweight squats — before touching the bag.

    Mistake 4: Treating it like barbell training.
    Many lifters try to apply strict barbell mechanics to sandbag work — and get frustrated when it doesn’t feel clean. The shifting load means the movement will never look textbook-perfect. Fix: embrace the chaos. The instability is the point. Focus on control and tension rather than aesthetics.

    Mistake 5: Neglecting recovery between sessions.
    Because sandbag training engages so many muscle groups at once — including deep stabilizers that rarely get used — soreness can be significant in the first few weeks. Fix: allow at least 48 hours between full sandbag sessions, and support recovery with adequate sleep and protein intake. Check out our guide on Foam Rolling for Adults for effective recovery strategies that pair beautifully with sandbag work.

    What to Eat to Support Sandbag Training

    Sandbag training is a strength-focused, metabolically demanding activity — so your nutrition should reflect that. The Academy of Nutrition and Dietetics recommends that active adults engaging in resistance training prioritize protein, quality carbohydrates, and adequate hydration.

    Protein: Aim for 0.7 to 1.0 grams of protein per pound of body weight daily if you’re training consistently. Lean meats, eggs, Greek yogurt, legumes, and fish are reliable sources. Protein synthesis — the muscle-rebuilding process your body runs after training — requires consistent dietary protein throughout the day, not just a post-workout shake.

    Carbohydrates: Complex carbs fuel your training sessions and replenish glycogen in muscles afterward. Whole grains, sweet potatoes, oats, and fruit are excellent options. The USDA Dietary Guidelines recommend that carbohydrates comprise 45 to 65 percent of total daily calories for active adults.

    Pre-workout: A light meal or snack 60-90 minutes before training — something like a banana with almond butter or a small bowl of oatmeal — provides sustained energy without digestive discomfort during heavy carries and squats.

    Post-workout: A protein-carbohydrate combination within 30-60 minutes of your session supports muscle recovery. Think: grilled chicken with rice, a protein smoothie with fruit, or cottage cheese with berries.

    Hydration: Sandbag training — especially when done as circuit-style conditioning — drives significant sweat loss. The ACSM recommends drinking 16-20 oz of water 2 hours before training, and continuing to hydrate during and after each session. If your workouts exceed 60 minutes or are done in heat, consider electrolyte replenishment.

    How Long Until You See Results — and What to Track

    Realistic expectations are part of a sustainable fitness plan. Here’s what the evidence suggests for most adults starting sandbag training:

    Weeks 1-2: Expect significant muscle soreness, especially in the core, lower back, forearms, and glutes. This is normal neuromuscular adaptation — your body learning new movement patterns. You won’t see visible changes yet, but your nervous system is working hard.

    Weeks 3-6: Coordination improves noticeably. Carries feel more controlled, your grip endurance grows, and the foundational movements start to feel natural. Most people report feeling stronger in daily activities — lifting boxes, carrying loads — within this window.

    Weeks 6-12: Visible strength and muscle definition begin to emerge, particularly in the shoulders, arms, and core. Cardiovascular endurance during conditioning-style circuits improves measurably. Research suggests that consistent resistance training over 8-12 weeks produces statistically significant improvements in muscle strength and body composition for most adults, according to findings published in the British Journal of Sports Medicine.

    What to track:

    • How far you can carry without rest (distance or time)
    • Number of reps per set with good form
    • Perceived effort on a 1-10 scale (should feel challenging, not impossible)
    • Recovery time between sets
    • Daily energy levels and sleep quality

    If you’re not seeing progress after 8 weeks of consistent training 3 times per week, consider consulting a certified strength and conditioning specialist. Results vary significantly based on sleep, stress levels, nutrition, and training history.

    You may also find it helpful to pair sandbag training with other functional modalities. For high-intensity variety, our article on Tabata Training for Adults offers a complementary protocol that works exceptionally well on alternating days.

    Frequently Asked Questions

    Is sandbag training safe for people with lower back issues?
    It depends on the nature and severity of your condition. For many adults with mild, chronic low back tension, sandbag training actually helps by strengthening deep spinal stabilizers — but you must start light, prioritize form, and avoid any exercise that causes pain. Always get medical clearance from your healthcare provider before starting if you have an existing back condition.

    Can sandbag training replace the gym entirely?
    For many adults, yes — especially if you combine sandbag work with bodyweight movements and some cardiovascular activity. A single sandbag can deliver full-body strength training, core conditioning, and metabolic work from your garage, backyard, or park. That said, results depend on your specific goals. If competitive powerlifting or maximum hypertrophy is your aim, a gym setup may still be beneficial.

    How much does a good training sandbag cost?
    Quality training sandbags typically range from $80 to $250, depending on size, material durability, and brand. This is a one-time investment that, unlike gym memberships, pays for itself quickly. Some people also DIY sandbags using heavy-duty contractor bags inside a duffel bag — a budget-friendly option for beginners exploring the modality.

    How does sandbag training compare to kettlebell training?
    Both are excellent tools for functional strength. Kettlebells excel in ballistic movements like swings, snatches, and Turkish get-ups. Sandbags shine in carrying, loading, and real-world simulation. Many fitness enthusiasts use both — and they complement each other well. If you’re curious about kettlebell work, our Outdoor Fitness Training guide explores how to combine multiple tools in an open-air setting.

    How often should I train with a sandbag per week?
    For most adults, 2-3 sessions per week with at least one rest day between sessions is optimal. This frequency aligns with ACSM guidelines for resistance training and allows adequate muscle recovery. If you’re also doing cardio or other strength work, factor in total training volume to avoid overtraining.

    Conclusion

    Sandbag training isn’t glamorous. There’s no sleek machine to sit in, no digital screen to track your reps, and no perfect grip every time. But that’s exactly the point. Life doesn’t offer perfect grips — and sandbag training prepares you for the real, messy, shifting demands of being a strong, capable adult.

    Start simple: one bag, a few movements, three days a week. Focus on form before weight, consistency before intensity, and progress before perfection. Small, steady improvements compound into significant results over weeks and months.

    The one thing you can do today: research a starter sandbag that fits your budget, clear some space, and commit to your first 15-minute session this week. That’s all it takes to begin.


    This article is for informational and educational purposes only. The content is not intended to replace professional medical, nutritional, or fitness advice. Always consult a qualified healthcare provider, registered dietitian, or certified fitness professional before starting a new health program or making significant changes to your lifestyle.

    Content reviewed by our wellness editorial team, with references to peer-reviewed research and guidelines from leading health organizations.

  • Tabata Training for Adults: The 4-Minute Workout That Works

    Tabata Training for Adults: The 4-Minute Workout That Works

    Tabata Training for Adults: The 4-Minute Workout That Works

    You probably have more time for a serious workout than you think — and four minutes of Tabata might prove it.

    Let’s be real: most of us have used "I don’t have time" as a reason to skip a workout at least once this week. Maybe more. But what if a structured, science-backed training protocol could deliver measurable cardiovascular and metabolic benefits in just four minutes? That’s the promise behind Tabata training — and surprisingly, the research actually backs it up.

    Tabata isn’t just another fitness trend with a catchy name. It’s a specific high-intensity interval training (HIIT) protocol developed in the mid-1990s by Japanese researcher Dr. Izumi Tabata, and it has since become one of the most studied and applied methods in exercise science. Whether you’re a complete beginner looking for an efficient entry point or a seasoned athlete wanting to maximize output in minimum time, Tabata training offers something real.

    In this guide, you’ll learn exactly how Tabata works, what the science says about its effectiveness, how to start safely, and what mistakes to avoid. No hype — just a practical, evidence-based breakdown of one of the most efficient workout formats available to adults today.

    Why Tabata Training Matters More Than You Think

    Time is consistently ranked as the number one barrier to regular exercise among American adults. According to the American College of Sports Medicine (ACSM), fewer than 25% of U.S. adults meet both the aerobic and muscle-strengthening physical activity guidelines — and lack of time is cited more often than any other reason.

    That’s where the efficiency of Tabata becomes genuinely compelling. A true Tabata round lasts just four minutes: eight intervals of 20 seconds of all-out effort followed by 10 seconds of rest. But don’t let the brevity fool you. Research published in the journal Medicine & Science in Sports & Exercise found that this format can tax both your aerobic and anaerobic energy systems simultaneously — something that steady-state cardio alone cannot do.

    For busy adults aged 25-60, this matters because it means you can get a metabolically meaningful workout during a lunch break, before the kids wake up, or in a hotel room while traveling. And unlike long cardio sessions that require significant recovery, Tabata sessions — when programmed correctly — can be completed several times per week.

    Beyond time efficiency, Tabata training supports cardiovascular health, body composition, and muscular endurance, making it relevant not just for athletes but for anyone who wants to stay active, maintain a healthy weight, and feel better in their daily life.

    The Science Behind How Tabata Actually Works

    The original Tabata protocol was developed in 1996 by Dr. Izumi Tabata and colleagues at the National Institute of Fitness and Sports in Japan. The landmark study compared moderate-intensity continuous training with a high-intensity interval group following the 20/10 protocol for six weeks.

    The results were striking. The moderate-intensity group improved their aerobic capacity (VO2 max) significantly, but showed minimal improvement in anaerobic capacity. The Tabata group, exercising for a fraction of the total weekly time, improved both aerobic capacity and anaerobic capacity by approximately 28%. This dual improvement — in both energy systems — is what makes the protocol scientifically unique.

    How does it work physiologically? The 20-second all-out bursts push your body to work at or near 170% of your VO2 max — far beyond what most conventional cardio achieves. The 10-second rest periods are intentionally too short to allow full recovery, which forces your body to keep drawing on stored energy and stressing multiple metabolic pathways at once.

    Busting a common myth: Many people assume that Tabata is only effective when done on a bike or treadmill, as in the original study. In reality, the protocol has been validated across a wide range of exercise modalities — bodyweight movements, kettlebells, rowing, and even resistance exercises — as long as the effort during work intervals is genuinely maximal. The format is what drives the adaptation, not the specific movement.

    It’s also worth noting that results vary significantly based on your starting fitness level. Highly trained individuals may need to push harder to replicate the same relative intensity as someone who is newer to exercise. This is not a one-size-fits-all protocol — it’s a framework that you calibrate to your own capacity.

    How to Get Started With Tabata Training

    Before you dive in, one important note: Tabata is high-intensity by design. If you’re new to exercise or returning after a long break, check with your healthcare provider first, particularly if you have cardiovascular concerns, joint issues, or are managing a chronic condition. The ACSM recommends a preparatory base of moderate-intensity exercise before jumping into maximal-effort intervals.

    That said, here’s how to approach Tabata at every level:

    Beginner (0-3 months of consistent exercise):

    • Start with modified Tabata: 15 seconds of effort, 15 seconds of rest, for 4 rounds instead of 8.
    • Choose low-impact movements: marching in place, step touches, modified squats, or standing knee raises.
    • Focus on form over intensity — speed and power come later.
    • Do 1-2 rounds total, 2 times per week, with at least one rest day between sessions.

    Intermediate (3-12 months of consistent training):

    • Follow the true Tabata protocol: 20 seconds on, 10 seconds rest, 8 rounds.
    • Choose moderate-demand moves: jump squats, push-ups, burpees (modified if needed), high knees, or mountain climbers.
    • Complete 2-3 full Tabata rounds per session, with 1 minute of rest between rounds.
    • Train 3 times per week, tracking heart rate to ensure you’re working near your maximum.

    Advanced (1+ year of structured training):

    • Combine multiple Tabata rounds targeting different muscle groups: upper body, lower body, and core.
    • Incorporate equipment: kettlebell swings, rowing machine sprints, barbell thrusters, or box jumps.
    • Stack 4-6 Tabata rounds for a 20-30 minute session with brief rest periods between rounds.
    • Limit to 3-4 sessions per week maximum — Tabata demands real recovery.

    Always warm up for 5-7 minutes before starting — dynamic movements like leg swings, arm circles, and light jogging prepare your joints and cardiovascular system for the intensity ahead. And always cool down with 5 minutes of low-intensity movement and static stretching. If you’re looking for guidance on recovery techniques, foam rolling for adults is an excellent complement to Tabata sessions.

    Common Mistakes That Sabotage Your Tabata Results

    Tabata looks simple on paper — 20 seconds on, 10 seconds off, repeat. But there are a handful of mistakes that consistently undermine people’s results. These are easy to make, especially when you’re new to the format.

    Mistake 1: Not going hard enough during the work intervals.
    This is the most common error. Tabata only works if you’re genuinely pushing near your maximum during those 20 seconds. If you finish all eight rounds feeling like you could easily do ten more, you weren’t working at the right intensity. The last two rounds should feel extremely challenging. Fix this by tracking your heart rate or using a rate of perceived exertion (RPE) scale — aim for a 9 out of 10 during work intervals.

    Mistake 2: Choosing the wrong exercises.
    Tabata is not the time for slow, controlled movements that require careful balance or intricate technique. Complex lifts like barbell deadlifts or single-leg Romanian deadlifts done at Tabata speed are injury risks, not performance enhancers. Choose exercises you know well, that involve large muscle groups, and that can be performed powerfully and safely under fatigue. Bodyweight squats, push-ups, jump rope, and sprints are excellent options.

    Mistake 3: Doing too much, too soon.
    Because Tabata sessions are short, it’s tempting to do five or six rounds back-to-back every single day. But the intensity of true Tabata creates significant metabolic stress that requires 24-48 hours of recovery. Overtraining with this protocol leads to fatigue, increased injury risk, and plateaued progress. More is not better here — optimal is better. For complementary lower-intensity options on recovery days, consider Pilates for adults, which supports core strength without adding intense cardio stress.

    Mistake 4: Skipping the warm-up.
    Jumping straight into all-out effort on cold muscles and a resting cardiovascular system is a recipe for injury and poor performance. A 5-7 minute dynamic warm-up is non-negotiable, especially for adults over 40 whose connective tissue and joints benefit greatly from gradual activation before maximal effort.

    Mistake 5: Neglecting recovery nutrition.
    Tabata depletes glycogen stores and creates muscle protein breakdown. Without adequate protein and carbohydrate intake within 30-60 minutes post-session, your body doesn’t have the raw materials to adapt and improve. According to the Academy of Nutrition and Dietetics, a post-exercise snack combining 15-25g of protein with a moderate carbohydrate source supports muscle repair effectively.

    What to Eat to Support Tabata Training

    Tabata training places real demands on your body — you need fuel to perform and nutrients to recover. You don’t need a complicated diet, but a few targeted nutrition habits make a meaningful difference.

    Before your session (1-2 hours prior): A small, easily digestible meal or snack that includes carbohydrates for energy and a modest amount of protein. Think: a banana with a tablespoon of almond butter, or a slice of whole-grain toast with a hard-boiled egg. The USDA Dietary Guidelines emphasize the importance of whole food carbohydrate sources for sustained energy during exercise.

    After your session (within 30-60 minutes): Prioritize protein to support muscle repair. Aim for 20-30g of high-quality protein — Greek yogurt, cottage cheese, eggs, a protein shake with whey or plant-based protein, or grilled chicken. Pair it with a carbohydrate source to replenish glycogen: fruit, rice, sweet potato, or oats.

    Throughout the day: Hydration is critical. Even mild dehydration impairs performance during high-intensity exercise, according to research published in the Journal of the American College of Nutrition. Aim for at least 8-10 cups of water daily, with additional intake around training sessions.

    Foods that support recovery: Anti-inflammatory choices — fatty fish like salmon or sardines, leafy greens, berries, turmeric, and olive oil — can help manage exercise-induced inflammation. Avoid heavy, processed meals before training, which can cause digestive discomfort during intense intervals.

    How Long Until You See Results — and What to Track

    One of the most searched questions about Tabata is: "How fast will I see results?" The honest answer is that it depends on your starting baseline, consistency, nutrition, sleep, and recovery habits. Results vary significantly from person to person.

    That said, here’s a realistic timeline based on available research and exercise science principles:

    • Weeks 1-2: Improved cardiovascular efficiency during sessions. You’ll notice you’re less winded by the end, heart rate recovers faster, and movements feel more coordinated.
    • Weeks 3-4: Measurable improvement in muscular endurance. You may complete more reps during each 20-second interval as your body adapts.
    • Weeks 6-8: Potential improvements in body composition (reduced body fat percentage, increased lean mass) when combined with appropriate nutrition. The original Tabata study showed significant physiological changes within 6 weeks.
    • Months 3+: Sustained cardiovascular improvements, enhanced metabolism, and notable strength and endurance gains — particularly if you progressively increase challenge over time.

    What to track:

    • Resting heart rate (lower over time indicates improved cardiovascular fitness)
    • Reps completed per interval (track improvements in work capacity)
    • Perceived exertion at the end of sessions (same effort should feel easier over weeks)
    • Energy levels and recovery between sessions
    • Body measurements or clothing fit, if body composition is a goal

    If after 8 weeks you’re not seeing any progress despite consistent training, it may be time to reassess your intensity, nutrition, or sleep quality — or consult with a certified personal trainer or registered dietitian for personalized guidance.

    Frequently Asked Questions About Tabata Training

    Is Tabata training safe for adults over 50?
    Tabata can be safe and effective for adults over 50, but it requires thoughtful modification. High-impact movements should be swapped for low-impact alternatives (e.g., step squats instead of jump squats), and intensity should be built gradually. The Mayo Clinic recommends that adults with cardiovascular conditions, joint issues, or osteoporosis consult a physician before beginning any high-intensity interval program. Many older adults find that modified Tabata delivers excellent cardiovascular benefits with reduced injury risk.

    Can I do Tabata every day?
    Generally, no. Because true Tabata requires maximal effort, daily sessions are likely to lead to overtraining, increased cortisol levels, and diminishing returns. Most exercise scientists and certified trainers recommend 3-4 Tabata sessions per week at most, with lower-intensity activity or active recovery on other days. Quality beats quantity here.

    Does Tabata help with weight loss?
    Tabata can support weight management by increasing caloric expenditure during and after sessions (via the EPOC effect — excess post-exercise oxygen consumption), preserving lean muscle mass, and improving metabolic efficiency. However, exercise alone rarely produces significant weight loss without corresponding attention to nutrition and lifestyle. Harvard Health Publishing notes that exercise is most effective for weight management when paired with dietary changes.

    What’s the difference between Tabata and regular HIIT?
    All Tabata is HIIT, but not all HIIT is Tabata. Tabata refers specifically to the 20-second work / 10-second rest / 8-round protocol at near-maximal intensity. General HIIT can use a wide range of work-to-rest ratios (1:1, 1:2, etc.) and intensity levels. Tabata is one of the most demanding HIIT protocols precisely because the rest periods are intentionally inadequate for full recovery.

    Do I need equipment for Tabata training?
    Absolutely not. Some of the most effective Tabata sessions use nothing but your bodyweight — squats, push-ups, burpees, mountain climbers, and high knees are all excellent options. Equipment like kettlebells, jump ropes, or rowing machines can add variety and intensity as you progress, but they’re completely optional. If you enjoy outdoor training, Tabata intervals pair extremely well with outdoor sprint sessions — check out outdoor fitness training for adults for complementary ideas.

    Start Small, Go Hard, and Stay Consistent

    Tabata training is proof that the quality of your effort matters far more than the quantity of your time. Four minutes done right will always outperform forty minutes done halfheartedly. And for adults navigating busy schedules, evolving bodies, and competing priorities, that efficiency is genuinely valuable.

    You don’t need to go from zero to six Tabata rounds on day one. Start with a modified version, learn the protocol, respect your body’s need for recovery, and build over time. Consistency across weeks and months is what drives real, lasting change — not a single brutally intense session.

    Your next step is simple: set a timer for 4 minutes, pick one exercise you know well, and try your first Tabata round today. Just one. See how it feels — then build from there.


    This article is for informational and educational purposes only. The content is not intended to replace professional medical, nutritional, or fitness advice. Always consult a qualified healthcare provider, registered dietitian, or certified fitness professional before starting a new health program or making significant changes to your lifestyle.

    Content reviewed by our wellness editorial team, with references to peer-reviewed research and guidelines from leading health organizations.
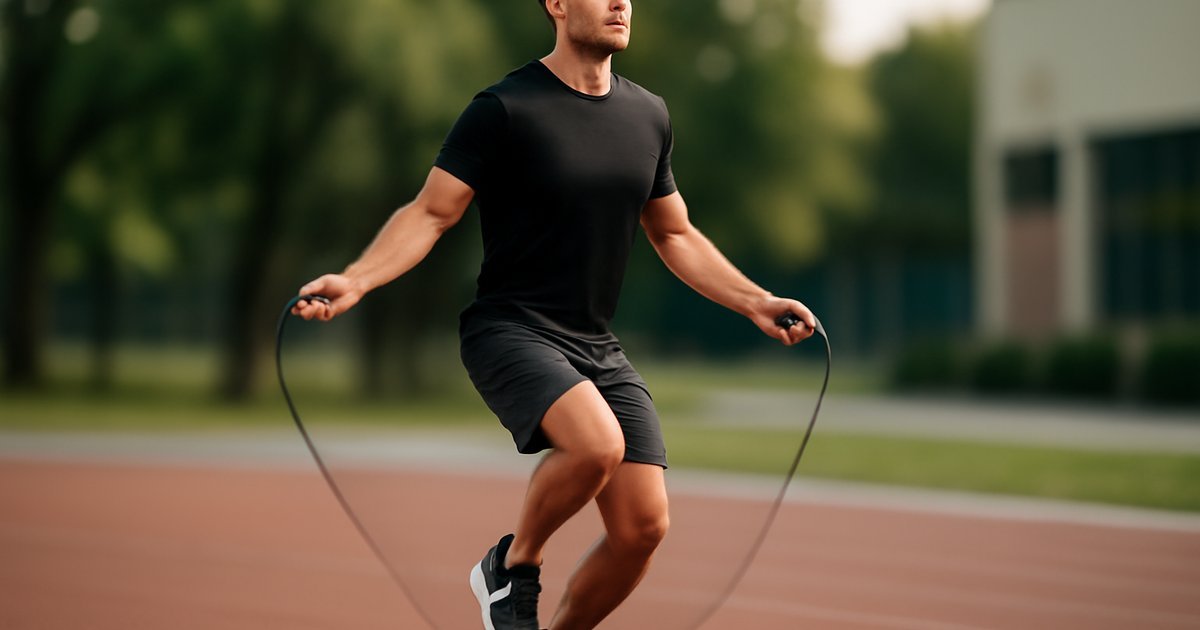
  • Outdoor Fitness Training: Build Strength and Endurance Outside

    Outdoor Fitness Training: Build Strength and Endurance Outside

    Outdoor Fitness Training: Build Strength and Endurance Outside

    If your gym motivation has been slipping lately, the fix might not be a new program — it might be a change of scenery.

    There’s a reason so many people feel energized after a hike but drained after an hour on the treadmill. The environment you train in affects your body and mind more than most fitness guides acknowledge. According to research published in Environmental Science & Technology, exercising outdoors is associated with greater feelings of revitalization, increased energy, and reduced tension compared to indoor exercise — even when intensity levels are identical.

    But outdoor fitness training isn’t just a mood booster. When done intentionally, it’s a complete training system that builds real-world strength, cardiovascular endurance, agility, and mental resilience — without requiring a gym membership, expensive equipment, or a rigid schedule.

    Whether you’re a seasoned gym-goer looking to shake things up or a busy adult who keeps skipping the gym because it feels like a chore, this guide will show you how to build a sustainable, effective outdoor fitness routine from the ground up. You’ll get the science, the strategy, and the practical steps to make it work — no matter your current fitness level.

    Why Outdoor Fitness Training Matters More Than You Think

    Most adults already know they should move more. But knowing and doing are different problems — and the environment plays a bigger role than we give it credit for.

    A landmark study published in PLOS ONE found that people who exercised outdoors were significantly more likely to report enjoyment and intention to repeat the activity compared to those who exercised indoors. That’s not a small detail — enjoyment is one of the strongest predictors of long-term exercise adherence, according to the American College of Sports Medicine (ACSM).

    Outdoor training also exposes you to natural light, which helps regulate your circadian rhythm and supports healthy cortisol patterns throughout the day. Exercising in daylight — especially in the morning — has been associated with improved sleep quality and mood stability, according to research reviewed by the National Sleep Foundation.

    From a physical standpoint, outdoor terrain introduces unpredictability that flat gym floors simply can’t replicate. Uneven surfaces engage stabilizer muscles, improve proprioception (your body’s sense of position in space), and challenge your balance in ways that translate directly to everyday life — especially as you age.

    For adults between 25 and 60, outdoor training hits a unique sweet spot: it’s accessible, scalable, and sustainable. You don’t need to carve out a commute to the gym. The park, the trail, the beach, or even your neighborhood block becomes your training ground.

    The Science Behind Outdoor Exercise: How It Actually Works

    Let’s clear up a common misconception first: outdoor training is not just a "lighter version" of gym training. Depending on how you structure it, it can match or exceed indoor workouts in intensity, muscle recruitment, and cardiovascular demand.

    When you run or walk on natural terrain — grass, gravel, sand, or trails — your lower body has to work harder to stabilize each step. A study published in the Journal of Experimental Biology found that running on natural surfaces requires approximately 5% more energy expenditure than treadmill running at the same pace, due to surface variability and wind resistance. That adds up significantly over time.

    Hill sprints and incline walking engage your glutes, hamstrings, and calves with far greater intensity than flat-surface equivalents. Outdoor bodyweight circuits — push-ups on park benches, pull-ups on playground bars, step-ups on curbs — activate multiple muscle groups simultaneously and elevate heart rate efficiently.

    There’s also a cognitive dimension worth noting. Research from Stanford University found that walking in natural environments reduced rumination (repetitive negative thinking) and lowered neural activity in regions of the brain associated with anxiety, compared to walking in urban environments. Outdoor fitness training, in other words, benefits your mental fitness alongside your physical performance.

    One myth worth busting: "You can’t build real muscle without gym equipment." While resistance machines and heavy barbells have their place, bodyweight progressions done outdoors — pistol squats, archer push-ups, single-leg deadlifts with a loaded backpack — can generate significant hypertrophic stimulus, particularly for beginners and intermediates. The key is progressive overload, not the equipment itself.

    How to Get Started with Outdoor Fitness Training

    The beauty of outdoor fitness is that your entry point doesn’t require much — just a plan and a willingness to show up. Here’s how to build a solid foundation:

    Step 1: Scout your training environment
    Before your first session, walk through your local park, trail, or neighborhood with fresh eyes. Identify natural features you can use: benches for step-ups and tricep dips, hills for sprints and lunges, open grass for bodyweight circuits, and trees or bars for hanging and pulling movements.

    Step 2: Set a realistic weekly schedule
    The ACSM recommends at least 150 minutes of moderate-intensity aerobic activity per week, plus two days of muscle-strengthening activity. For outdoor training, this might look like:

    • Monday: 30-minute trail walk or hill intervals (cardio focus)
    • Wednesday: 25-minute bodyweight strength circuit at the park (strength focus)
    • Friday: 30-minute run or power walk with sprint bursts (cardio + power)
    • Saturday: Active recovery — yoga on the grass, light stretching, leisurely walk

    Beginner option: Start with three 20-minute sessions per week. Focus on brisk walking, basic bodyweight movements (squats, lunges, push-ups), and one hill or incline per session. Intensity should feel like a 5-6 out of 10.

    Intermediate option: Add circuit training — alternate between 40 seconds of effort and 20 seconds of rest across 5-7 movements. Include hill sprints at 80-85% effort for 20-30 seconds, followed by full recovery.

    Advanced option: Incorporate loaded carries (use a weighted backpack), plyometric movements (box jumps on park benches, bounding uphill), and trail running with elevation changes. Prioritize heart rate monitoring and periodize your training in 4-6 week cycles.

    Step 3: Invest in a few basics
    You don’t need much, but these make a real difference: supportive trail or running shoes suited to your terrain, a quality resistance band or two, a jump rope for warm-ups, and a water bottle. That’s honestly enough to get started effectively.

    For more ideas on cardio training you can take outside, check out our guide on Jump Rope Training for Adults: Cardio, Coordination & Results.

    Common Mistakes That Sabotage Outdoor Training Results

    Even motivated adults fall into the same traps when they take their workouts outside. Here are the most common — and how to avoid them:

    Mistake 1: Underestimating intensity (or overestimating it)
    Without gym machines telling you exactly what resistance you’re using, it’s easy to go either too easy or too hard. Too easy and you stop progressing; too hard and you risk injury or burnout. Fix this by using a rate of perceived exertion (RPE) scale or a heart rate monitor. For aerobic work, aim for 65-75% of your max heart rate. For high-intensity intervals, push to 80-90% during work periods.

    Mistake 2: Skipping the warm-up because "you’re already outside"
    It’s a common rationalization — you stepped outside, so you’re "ready." But cold muscles and stiff joints need preparation regardless of location. Spend 5-7 minutes on dynamic movements: leg swings, arm circles, hip rotations, and a brisk walk before picking up intensity. This dramatically reduces injury risk and improves performance, per the ACSM’s guidelines on warm-up protocols.

    Mistake 3: No progression plan
    Many people repeat the same outdoor loop at the same pace indefinitely and then wonder why they’ve plateaued. Just like gym training, outdoor fitness requires progressive overload — gradually increasing distance, adding elevation, shortening rest periods, or adding resistance. Track your sessions in a simple notebook or app and aim to increase one variable every 1-2 weeks.

    Mistake 4: Ignoring weather and sun exposure
    Training in summer heat without proper hydration is a real risk. The American College of Sports Medicine recommends drinking 17-20 oz of water 2 hours before outdoor exercise and 7-10 oz every 20 minutes during activity in warm conditions. Always apply broad-spectrum SPF 30+ sunscreen when training outdoors, especially between 10 a.m. and 2 p.m.

    Mistake 5: Neglecting recovery
    The outdoor setting can make training feel less intense than it is — until the next morning, when your legs remind you otherwise. Build in at least one full rest day per week, and consider adding foam rolling or light mobility work post-session. Our guide on Foam Rolling for Adults: Recovery, Mobility & Pain Relief offers a practical recovery approach that pairs perfectly with outdoor training.

    What to Eat to Support Outdoor Fitness Training

    What you eat before and after outdoor sessions can meaningfully affect your performance and recovery — especially in variable conditions like heat or cold.

    Pre-workout (1-2 hours before):
    Focus on easily digestible carbohydrates with a small amount of protein. The Academy of Nutrition and Dietetics recommends something like a banana with peanut butter, oatmeal with berries, or a small whole-grain wrap with turkey. Avoid heavy fats and fiber right before training — they slow digestion and can cause GI discomfort during activity.

    During longer sessions (60+ minutes):
    For sustained outdoor activity, replenishing electrolytes matters — not just water. Sodium helps retain fluid and prevents cramping. A small sports drink, coconut water, or a homemade electrolyte mix (water + pinch of sea salt + splash of citrus) can help during extended sessions in heat.

    Post-workout (within 30-60 minutes):
    Aim for a 3:1 or 4:1 ratio of carbohydrates to protein to support glycogen replenishment and muscle repair. Practical options: Greek yogurt with granola and fruit, a protein smoothie with banana and oats, or eggs on whole-grain toast. Research published in the Journal of the International Society of Sports Nutrition supports consuming 20-40g of protein post-exercise to optimize muscle protein synthesis.

    Hydration:
    Don’t wait until you’re thirsty. By the time thirst kicks in, you may already be 1-2% dehydrated — enough to noticeably impair performance and cognitive function. Start sessions well-hydrated and continue sipping throughout. The general guideline from the USDA Dietary Guidelines is approximately 3.7 liters daily for men and 2.7 liters for women from all beverages and foods.

    How Long Until You See Results and What to Track

    Realistic expectations matter — both for motivation and for knowing when something isn’t working.

    For most adults starting outdoor fitness training from a relatively sedentary baseline:

    • Weeks 1-2: Improved mood, better sleep, reduced post-session fatigue. These are neurological and hormonal shifts, not yet structural changes.
    • Weeks 3-6: Noticeable improvements in endurance — hills feel easier, resting heart rate may begin to drop. Muscle tone changes may start to appear, especially in legs and core.
    • Weeks 8-12: Measurable cardiovascular improvement, increased strength in compound movement patterns, potential changes in body composition if nutrition is aligned.

    These timelines vary significantly based on starting fitness level, training frequency, sleep quality, and nutrition. Results are not linear — and that’s completely normal.

    What to track:

    • Resting heart rate (lower = improving cardiovascular fitness)
    • Session duration and perceived effort (tracking RPE helps spot fitness gains)
    • How quickly you recover between intervals (recovery time shortens as fitness improves)
    • Energy levels throughout the day following training sessions
    • Sleep quality — many people see improvement within 2-3 weeks of consistent outdoor training

    If after 8-10 consistent weeks you see no improvement in any of these markers, that’s a good signal to reassess your nutrition, sleep, or training structure — or to consult a certified personal trainer or your primary care provider.

    If you want to complement your outdoor sessions with structured indoor work, our guide on Pilates for Adults: Core Strength, Posture & Control offers excellent cross-training benefits, especially for stability and injury prevention.

    Frequently Asked Questions

    Can outdoor training replace a gym membership entirely?
    For many adults, yes — especially for cardiovascular fitness, endurance, and functional strength. The main limitation is heavy resistance training for maximum hypertrophy, where barbells and machines offer advantages. However, with creative use of bodyweight progressions, resistance bands, and loaded carries, outdoor training can be a fully effective and complete program for most fitness goals.

    Is outdoor training safe in cold weather?
    Generally yes, with proper precautions. Layer moisture-wicking base layers under insulating midlayers, protect your extremities (gloves, hat), and warm up more thoroughly before intense effort. The Mayo Clinic recommends avoiding outdoor exercise when temperatures fall below -20°F wind chill and always telling someone your route when training in isolated areas.

    What if I live in a city with limited green space?
    Urban environments offer more than you might think: stairs, park benches, open plazas, and even sidewalks are legitimate training tools. Urban outdoor fitness — stair climbs, bench circuits, brisk walking between landmarks — can be just as effective. Even concrete surfaces offer resistance and variability that treadmills lack.

    How do I stay consistent when the weather is unpredictable?
    Have a "weather plan B" — a short indoor bodyweight circuit you can do in 20 minutes at home on days when outdoor training isn’t safe. Consistency over months matters far more than any single perfect session. Allow yourself flexibility without abandoning the habit entirely.

    Do I need to track my workouts when training outdoors?
    You don’t need to obsessively log every rep, but some tracking is helpful for progression. A simple fitness app (like Strava, Nike Run Club, or even a notes app) where you log duration, route, and how you felt goes a long way. Without any tracking, it’s easy to plateau without realizing it.

    Start Small, Go Outside, and Build From There

    Outdoor fitness training isn’t a trend — it’s one of the most time-tested, science-supported ways to build lasting health habits that actually stick. The combination of fresh air, natural terrain, and varied movement creates a training environment that engages your whole self: body, mind, and mood.

    You don’t need a perfect plan or ideal conditions to start. Pick one session this week — a brisk 25-minute park walk with three sets of push-ups and lunges — and do it. Then do it again next week. Small, consistent action builds momentum that no motivation hack can replicate.

    The trail is already there. Your job is just to show up.


    Wellness Disclaimer: This article is for informational and educational purposes only. The content is not intended to replace professional medical, nutritional, or fitness advice. Always consult a qualified healthcare provider, registered dietitian, or certified fitness professional before starting a new health program or making significant changes to your lifestyle.

    Author Line: Content reviewed by our wellness editorial team, with references to peer-reviewed research and guidelines from leading health organizations.
  • Jump Rope Training for Adults: Cardio, Coordination & Results

    Jump Rope Training for Adults: Cardio, Coordination & Results

    Jump Rope Training for Adults: Cardio, Coordination & Results

    It looks simple, it feels nostalgic — and it might be the most underrated full-body workout you’re not doing yet.

    Picture this: you’re standing in a gym surrounded by treadmills, stationary bikes, and ellipticals — and all of them are taken. A jump rope hangs on the wall nearby, mostly ignored. That rope might actually be the most effective piece of equipment in the room, and most adults walk right past it.

    Jump rope training has quietly made its way back into the fitness conversation, and for good reason. It’s not just for boxers or kids at recess. For adults between 25 and 60 who want to improve cardiovascular fitness, burn calories efficiently, sharpen coordination, and build lower-body endurance — all in a short window of time — jumping rope delivers results that rival far more complicated routines.

    The challenge? Most people either dismiss it as too basic or assume it’s too intense for their fitness level. Neither is true. In this guide, you’ll learn exactly how jump rope training works, how to start safely, what mistakes to avoid, and how to build a practice that fits your real life — whether you’re a complete beginner or someone looking for a smarter cardio option.

    Why Jump Rope Training Matters More Than You Think

    Cardio has a reputation problem. Many adults either avoid it entirely or spend long, uninspiring hours on machines they don’t enjoy. What gets lost in that equation is efficiency — specifically, the ability to get real cardiovascular benefit in less time.

    Jump rope training is one of the most calorie-efficient forms of exercise available. According to research published in the Research Quarterly for Exercise and Sport, jumping rope at a moderate pace burns approximately 10 to 16 calories per minute — comparable to running at 8 miles per hour. That means 10 minutes of focused jump rope work can match what takes 30 minutes on a slow treadmill walk.

    But the benefits go beyond calorie burn. The American College of Sports Medicine (ACSM) highlights that activities requiring coordination, rhythm, and bilateral movement — like jumping rope — engage the brain as well as the body. This neural engagement supports reaction time, agility, and even cognitive sharpness over time.

    For adults concerned about bone density, which naturally declines after age 30, jump rope is particularly relevant. Because it’s a weight-bearing, impact-based activity, it stimulates bone remodeling in the feet, ankles, and legs. The National Institutes of Health (NIH) notes that weight-bearing exercises are among the most effective tools for maintaining skeletal health in adults.

    And perhaps most practically: a quality jump rope costs less than $30 and fits in a gym bag. The barrier to entry is almost zero.

    The Science Behind Jump Rope Training

    Here’s a common misconception: jumping rope is all cardio and no strength. That’s not accurate. Every jump requires your calves, hamstrings, glutes, and core to fire in sequence. Your shoulders and forearms stay active to control the rope’s rotation. Over time, this creates a surprisingly comprehensive training stimulus — cardiovascular and muscular at once.

    From a cardiovascular standpoint, jumping rope is classified as high-intensity aerobic exercise. A study published in the Journal of Sports Science & Medicine found that a 10-week jump rope program significantly improved cardiovascular fitness, body composition, and motor coordination in adults compared to a control group. The participants trained just 10 minutes per day — not an hour, not 45 minutes. Ten minutes.

    Jump rope also trains what’s called reactive strength — the ability of your muscles and tendons to store and release energy quickly. This is the same mechanism that makes your Achilles tendon act like a spring when you walk or run. Training this quality improves running economy and reduces injury risk in activities outside of rope jumping itself.

    One myth worth addressing: jumping rope is too hard on the joints. For most healthy adults, the opposite is true. Because jump rope keeps jumps low — typically just one to two inches off the ground — the impact per rep is relatively modest. The key is landing softly on the balls of your feet, not your heels, which distributes force through the calf and ankle rather than driving it into the knee.

    That said, results vary significantly based on your starting fitness level, joint health history, and technique. If you have pre-existing knee, ankle, or hip concerns, consult a healthcare provider before beginning.

    How to Get Started with Jump Rope Training

    Before you pick up a rope, a few setup basics matter more than most people realize.

    Choose the right rope length. Stand on the middle of the rope and pull the handles up — they should reach your armpits. Too long and it drags; too short and it clips your feet constantly. For beginners, a slightly heavier PVC rope (rather than a thin speed rope) gives more feedback and is easier to control.

    Find the right surface. A sprung wood floor, rubber mat, or short-cut grass surface is ideal. Avoid concrete or hard tile if possible — these surfaces transfer more impact force upward and tire your legs faster in the early weeks.

    Wear proper footwear. Cross-trainers or lightweight training shoes with forefoot cushioning work well. Running shoes with heavy heel cushioning can actually work against you here, since you’re landing on the ball of the foot.

    Now for the actual training progression:

    Beginner (Weeks 1–3):

    • Start with 30 seconds on, 60 seconds rest — repeat 5 to 8 rounds
    • Focus entirely on rhythm and soft landings — speed is irrelevant at this stage
    • Aim for 3 sessions per week with rest days in between
    • If you trip, simply restart — tripping is part of learning, not failure

    Intermediate (Weeks 4–8):

    • Increase work intervals to 45 seconds, reduce rest to 45 seconds
    • Begin practicing alternating feet (running in place while jumping) to reduce fatigue per leg
    • Add jump rope finishers to strength training sessions — 3 rounds at the end of a workout
    • Introduce 2 minutes of continuous jumping as a benchmark goal

    Advanced (Week 9+):

    • Explore double-unders (rope passes twice per jump) for elevated cardiovascular intensity
    • Build to 10 to 15 minutes of continuous or interval jumping per session
    • Incorporate jump rope into circuit training with bodyweight or strength movements

    If you’re looking for complementary training options that pair well with jump rope, stair climbing and rowing machine work both target similar energy systems and make excellent cross-training companions.

    Common Mistakes That Sabotage Results

    Jump rope looks deceptively simple — which is exactly why most people get it wrong in the same three or four ways.

    Mistake 1: Jumping too high. This is the most universal beginner error. When you jump two to four inches off the ground instead of one inch, you exhaust your legs in the first 30 seconds and your heart rate spikes for the wrong reasons. The rope only needs about one inch of clearance to pass under your feet. Keep jumps small, tight, and controlled.

    Mistake 2: Using your whole arm to spin the rope. The rotation of the rope comes from your wrists — not your elbows or shoulders. When your elbows flare out wide to turn the rope, your timing gets inconsistent and your upper body fatigues unnecessarily. Keep elbows slightly bent and close to your torso; let your wrists do the turning.

    Mistake 3: Going too fast, too soon. Because jump rope looks fast in videos and fitness content, there’s a temptation to ramp up speed immediately. Speed without rhythm creates a cycle of tripping, frustration, and quitting. A slow, perfectly timed rhythm will outlast a frantic, sloppy one every time — and it trains better motor patterns for the long run.

    Mistake 4: Skipping the warm-up. Jumping rope cold — especially for adults over 35 — is a fast track to calf tightness or Achilles discomfort. A 5-minute warm-up that includes ankle circles, calf raises, light marching, and a few bodyweight squats primes the lower leg tissues for the repetitive impact. Mayo Clinic consistently recommends dynamic warm-ups before any higher-intensity activity.

    Mistake 5: Treating every session like a race. Jump rope is versatile — it can be high intensity or moderate intensity, depending on pace and rest intervals. Many adults make the mistake of treating every session as all-out effort, burning out within two weeks. Build in lower-intensity sessions at 60 to 70 percent effort to allow recovery while maintaining the habit.

    What to Eat to Support Jump Rope Training

    Jump rope training is aerobic and anaerobic — it draws from both your carbohydrate and fat energy stores depending on intensity. Your nutrition needs to reflect that dual demand.

    Before training: A light carbohydrate-rich snack 30 to 60 minutes before a session helps maintain energy for higher-intensity intervals. Options include a banana with a small amount of nut butter, oatmeal with fruit, or a slice of whole grain toast. The Academy of Nutrition and Dietetics recommends avoiding high-fat or high-fiber foods immediately before exercise, as these slow digestion and can cause discomfort during higher-impact movement.

    Protein for recovery: Because jump rope activates significant lower-leg and core musculature, adequate protein intake supports muscle repair between sessions. The USDA Dietary Guidelines for Americans recommend 0.8 grams of protein per kilogram of body weight as a minimum for adults — many sports nutrition researchers suggest active adults benefit from 1.2 to 1.6 grams per kilogram. Practical sources include eggs, Greek yogurt, lean poultry, legumes, and cottage cheese.

    Hydration matters more than most people think: Even short jump rope sessions produce significant sweat output. Harvard Health Publishing notes that mild dehydration — as little as a 1 to 2 percent reduction in body water — can impair physical performance and increase perceived exertion. Aim for consistent water intake throughout the day, not just during exercise. A practical rule: your urine should be pale yellow before you begin a session.

    What to limit: Excess sugar before training creates energy spikes followed by crashes that interrupt rhythm and focus. Ultra-processed foods high in refined carbohydrates can blunt the fat-adaptation benefits of moderate-intensity rope sessions. The American Heart Association’s general guidance to limit added sugars to 25 to 36 grams per day applies well here.

    How Long Until You See Results — and What to Track

    Realistic expectations are the foundation of sustainable habits. Here’s an honest breakdown of what research and practice show:

    Weeks 1–2: Expect coordination improvements first. You’ll trip less, your rhythm will become more consistent, and your calf endurance will begin to build. Cardiovascular changes are happening internally — VO2 max adaptation begins within the first few sessions — but won’t be visibly apparent yet.

    Weeks 3–6: Most adults notice measurable improvements in resting heart rate, reduced breathlessness during daily activities, and improved stamina during sessions. If nutrition is aligned, some body composition changes may begin to emerge, though results vary significantly based on baseline activity level, diet, and sleep quality.

    Weeks 8–12: With consistent training (3 to 4 sessions per week), research suggests meaningful cardiovascular fitness improvements, improved coordination, and more stable energy levels throughout the day. The Journal of Sports Science & Medicine study cited earlier showed statistically significant fitness gains in adults by the 10-week mark.

    What to track:

    • Continuous jump time — how long can you go without tripping?
    • Resting heart rate each morning (a downward trend indicates improved cardiovascular fitness)
    • Rate of perceived exertion (RPE) at the same pace over time — it should feel easier
    • Session duration and weekly volume

    If you’re not seeing progress after 8 weeks of consistent effort, consider reassessing your nutrition, sleep quality, or consulting with a certified fitness professional for programming adjustments. For adults with cardiovascular concerns or significant joint issues, a physician clearance before beginning is always the right call.

    For those who also want to improve core stability alongside their cardio gains, Pilates is an excellent complement to jump rope training — it builds the postural foundation that makes every jump more efficient.

    Frequently Asked Questions

    Is jump rope training safe for adults over 50?
    For most healthy adults over 50, jumping rope is safe and effective — particularly for bone density and cardiovascular health. The key is starting with shorter sessions, prioritizing soft landings, and wearing supportive footwear. Adults with osteoporosis, arthritis, or balance concerns should consult a physician or physical therapist before starting.

    How many days per week should I jump rope?
    Three to four days per week is the sweet spot for most adults balancing recovery with progress. Because jumping rope stresses the calves and Achilles tendon specifically, rest days are especially important in the early weeks. Daily jumping is possible for experienced practitioners, but beginners should build up gradually.

    Can jump rope replace running for cardio?
    Yes, for many adults it can — and in some cases it’s a better option. Jump rope offers similar cardiovascular benefits in less time, with arguably less repetitive stress on the knee joint compared to long-distance running on hard surfaces. However, running has unique benefits for lower-body endurance and mental clarity outdoors. The best answer depends on your goals and what you’ll actually stick with.

    Will jumping rope help me lose weight?
    Jump rope training can contribute to a calorie deficit when combined with a balanced diet — which is the foundational mechanism of fat loss. On its own, without nutritional alignment, no exercise modality guarantees weight loss. That said, its high calorie-per-minute output makes it one of the more efficient tools for those managing body composition.

    What’s the difference between a speed rope and a weighted rope?
    Speed ropes are thin, lightweight, and designed for fast rotations — ideal for advanced users focused on cardio intervals or double-unders. Weighted ropes (typically 1 to 2 pounds) rotate more slowly, offer more upper-body engagement, and provide better tactile feedback for beginners. Most adults starting out do better with a slightly heavier PVC rope before transitioning to a speed rope.

    The Bottom Line

    Jump rope training is one of the most practical, evidence-supported cardio options available to adults who want real results without complicated equipment or long time commitments. It trains your heart, lungs, legs, coordination, and even your brain — simultaneously, in a fraction of the time most traditional cardio requires.

    You don’t need to be a boxer or an athlete to benefit from it. You just need a rope, enough space to swing it, and the willingness to look a little awkward for the first two weeks while your body figures it out. That awkwardness fades fast.

    Start with 10 minutes, three times a week. Focus on rhythm over speed. Land softly. Give it six weeks before you judge the results.

    Small, consistent steps beat the perfect program you never start. Your rope is waiting.


    Wellness Disclaimer: This article is for informational and educational purposes only. The content is not intended to replace professional medical, nutritional, or fitness advice. Always consult a qualified healthcare provider, registered dietitian, or certified fitness professional before starting a new health program or making significant changes to your lifestyle.

    Author Note: Content reviewed by our wellness editorial team, with references to peer-reviewed research and guidelines from leading health organizations.

  • Barre Workout for Adults: Tone, Strength & Flexibility

    Barre Workout for Adults: Tone, Strength & Flexibility

    You don’t need a ballet background — or even good coordination — to get a seriously effective workout from barre.

    Picture this: you’re standing at a sturdy chair, doing tiny pulsing movements with your thighs burning like you just ran a mile — and you haven’t moved more than an inch. That’s the paradox of barre workouts, and it’s exactly why millions of adults have added this low-impact, high-intensity method to their fitness routine.

    Barre training has evolved far beyond its dance-studio roots. Today, it’s one of the most accessible and effective ways for adults to build muscular endurance, improve posture, and develop the kind of functional strength that makes everyday life easier. Whether you’re completely new to structured exercise or looking to complement your existing routine, barre offers something genuinely different — and the science backs it up.

    In this guide, you’ll learn what barre workouts actually do to your body, how to start safely, the most common mistakes beginners make, and what realistic results look like over time. No tutus required.

    Why Barre Workouts Matter More Than You Think

    Most people assume barre is just a trendy fitness class for dancers. In reality, it’s a discipline rooted in rehabilitation science, ballet technique, and resistance training — a combination that produces measurable results for adults at nearly every fitness level.

    What makes barre particularly valuable is its emphasis on isometric contractions and small-range-of-motion movements. Rather than large, dynamic lifts, barre targets muscles through sustained holds and micro-pulses that keep fibers under tension far longer than typical reps. This prolonged time under tension is a key driver of muscular endurance and hypertrophy, according to research published in the Journal of Strength and Conditioning Research.

    According to the American College of Sports Medicine (ACSM), adults should engage in muscle-strengthening activities at least two days per week. Barre qualifies — and because it’s low-impact and joint-friendly, it’s especially relevant for the 54 million Americans dealing with some form of arthritis or joint discomfort, per the CDC.

    Beyond strength, barre builds something that most gym programs overlook: body awareness. The controlled, precise movements train your nervous system to engage the right muscles at the right time — a quality that directly reduces injury risk in daily life, whether you’re carrying groceries or climbing stairs.

    The Science Behind How Barre Actually Works

    Here’s the most common misconception about barre: because the movements are small and there’s no heavy lifting, people assume it’s not a "real" workout. That’s simply not true — and the physiology explains why.

    Barre’s signature technique — the isometric hold followed by rapid micro-pulses — creates a sustained recruitment of slow-twitch and fast-twitch muscle fibers simultaneously. A 2021 study published in the International Journal of Exercise Science found that isometric training at moderate intensities produced significant gains in muscular endurance and functional strength in adults aged 30–60, comparable to traditional resistance training protocols.

    The "shake" you feel during a barre hold isn’t weakness — it’s your muscle fibers reaching fatigue and recruiting deeper motor units to compensate. That’s exactly the mechanism that drives strength and endurance adaptations over time.

    Barre also has a meaningful cardiovascular component. A study from the Journal of Dance Medicine and Science found that a 60-minute barre class elevated participants’ heart rates to 55–75% of maximum heart rate — well within the aerobic training zone recommended by the American Heart Association for cardiovascular health.

    The myth to bust: Barre will make women "bulky." Because barre uses bodyweight and light resistance at high repetitions, it builds lean muscular endurance — not large muscle mass. The hormonal and mechanical conditions that drive significant hypertrophy simply aren’t present in a standard barre session.

    How to Get Started with Barre Training

    One of barre’s biggest advantages is how accessible it is from day one. You don’t need special equipment, a dance background, or even a class — though all of those can help.

    What you’ll need to begin:

    • A sturdy chair, countertop, or wall to use as your "barre"
    • Non-slip socks or bare feet on a yoga mat
    • Comfortable, form-fitting clothing so you can see your alignment
    • Optional: light resistance bands or 2–5 lb dumbbells for upper body work

    Beginner Level — Weeks 1–3:

    1. Start with 2 sessions per week. Give your muscles — especially your hips, inner thighs, and core — time to adapt. Delayed onset muscle soreness (DOMS) from barre can be surprisingly intense for new practitioners.
    2. Focus on alignment first. A neutral spine, engaged core, and level hips are the foundation of every barre exercise. Form matters far more than depth or range of motion.
    3. Try a beginner-friendly 20-minute routine. Key movements: parallel and turnout plié squats, relevé holds, glute bridges, and tabletop leg lifts. Hold each position for 30–45 seconds before pulsing.
    4. Use a mirror if possible. Barre is highly technique-dependent. Visual feedback helps you catch misalignments early.

    Intermediate Level — Weeks 4–8:

    1. Increase sessions to 3–4 per week and extend class duration to 45–60 minutes.
    2. Introduce arabesque holds, passé balance work, and single-leg variations to build stability and challenge your core more deeply.
    3. Add a resistance band around your thighs during glute and hip work to increase intensity without adding impact.

    Advanced Options: Incorporate elevated barre work (on demi-pointe), increased time under tension (60+ second holds), and flowing sequences that elevate heart rate. Consider classes that blend barre with Pilates or HIIT for greater metabolic demand. If you’re looking for complementary low-impact training, Pilates for Adults pairs particularly well with barre programming.

    Common Mistakes That Sabotage Your Barre Results

    Barre looks deceptively simple — and that’s exactly what makes it easy to do wrong. These mistakes are incredibly common, even among people who’ve been practicing for months.

    1. Gripping the barre too tightly.
    The chair or barre is there for light balance support — not to bear your weight. When you grip it hard, you shift load away from your legs and core, reducing the exercise’s effectiveness by a significant margin. Fix it: rest just two or three fingers on the surface, as if you’re lightly touching a banister.

    2. Letting the lower back arch during seat work.
    During glute exercises like arabesque lifts or hydrant pulses, many people arch the lumbar spine to get more range of motion. This strains the lower back and disengages the glutes entirely. Fix it: actively tuck your pelvis slightly and maintain a "long spine" throughout. Smaller range with better form will always produce better results.

    3. Not engaging the core consistently.
    Barre is fundamentally a core workout disguised as a lower body workout. If your abdominals aren’t actively braced throughout every movement, you’re missing half the training stimulus. Fix it: before each exercise, take a breath in, exhale, and draw your navel gently toward your spine. Maintain that engagement throughout.

    4. Rushing through the pulses.
    The micro-pulse is barre’s defining technique, and it only works when done slowly and with control. Fast, sloppy pulses use momentum instead of muscle. Fix it: think "one inch up, one inch down" with complete muscular control on both the up and down phase.

    5. Skipping the stretching segment.
    Barre classes always end with targeted stretching — and it’s not optional filler. The muscles you’ve worked through sustained contractions need lengthening to recover properly and maintain flexibility. According to the American College of Sports Medicine, post-exercise stretching held for 15–30 seconds significantly improves flexibility over time. Don’t leave early. If mobility is a priority for you, pairing barre with a dedicated foam rolling recovery routine can further accelerate your progress.

    What to Eat to Support Your Barre Training

    Barre is a muscular endurance workout, which means your nutritional focus should support muscle recovery and sustained energy — not extreme caloric restriction.

    Protein: The Academy of Nutrition and Dietetics recommends 1.2–1.7 grams of protein per kilogram of body weight for adults engaged in regular resistance training. For a 150 lb adult, that’s approximately 82–116 grams per day. Good sources: Greek yogurt, eggs, chicken breast, lentils, cottage cheese, and edamame.

    Pre-workout fuel (1–2 hours before): A small meal combining complex carbohydrates and protein supports performance during sustained isometric work. Examples: a banana with almond butter, oatmeal with berries, or whole-grain toast with cottage cheese.

    Post-workout recovery (within 45 minutes): Pair fast-digesting carbohydrates with protein to replenish glycogen and support muscle repair. A fruit-and-protein smoothie, Greek yogurt with fruit, or a rice cake with turkey and avocado all work well.

    Hydration: Even though barre isn’t high-sweat like a spin class, you’re still losing fluid through sustained muscular effort. The National Academies recommends approximately 2.7 liters (91 oz) of total water daily for women and 3.7 liters (125 oz) for men — more if you’re active.

    What to avoid: Heavy meals within 60 minutes of class — they can cause discomfort during core and abdominal work. Also minimize refined sugar before sessions, as blood sugar spikes followed by crashes will undermine endurance during long isometric holds.

    How Long Until You See Results — and What to Track

    This is where honesty matters most, because barre results are real — but they don’t show up the way many people expect.

    Weeks 1–2: You’ll likely feel increased muscular soreness, especially in your inner thighs, glutes, and postural muscles. This is normal and a sign that you’re activating underused muscle groups. Don’t expect visible changes yet.

    Weeks 3–6: Most practitioners report noticeable improvements in posture, core stability, and balance. Harvard Health Publishing notes that muscular endurance improvements are often felt before they’re visible — you’ll notice you can hold positions longer and with less shaking.

    Weeks 6–12: With consistent 3–4 sessions per week, you can expect visible muscle tone, particularly in the glutes, thighs, and arms. Body composition changes are modest compared to higher-intensity training, but postural transformation can be significant and lasting.

    What to track:

    • How long you can hold a barre position before form breaks down
    • Posture improvements (photograph your side profile monthly)
    • Balance — can you hold a single-leg relevé for 15, 30, then 45 seconds?
    • Energy levels and how you feel during daily activities
    • Range of motion in hips, hamstrings, and shoulders

    When to reassess: If after 8 weeks of consistent training you feel no improvement in strength or endurance, consider increasing session frequency, adding resistance bands, or consulting a certified fitness professional to review your form. Results vary significantly depending on your baseline fitness, nutrition, and recovery quality. For a different kind of low-impact challenge that complements barre well, consider exploring Balance Training for Adults.

    Frequently Asked Questions About Barre Workouts

    Is barre good for weight loss?
    Barre can contribute to a healthy weight management strategy, but it’s not primarily a calorie-burning workout. A 60-minute class burns approximately 300–400 calories on average, according to estimates from the American Council on Exercise. Its bigger contribution to body composition is building lean muscle mass, which supports a healthier metabolic rate over time. Pair barre with cardio training and a balanced diet for weight loss goals.

    Can men benefit from barre training?
    Absolutely. Barre addresses flexibility deficits, hip mobility, and postural imbalances that are extremely common in men — particularly those who do heavy lifting or sit for long periods. The hip flexor, inner thigh, and spinal stabilizer work in barre directly addresses weak points in most male athletic profiles. The only barrier is perception, not physiology.

    How is barre different from Pilates?
    Both disciplines emphasize core stability, controlled movement, and postural alignment — but their methods differ. Pilates uses specialized equipment (or a mat) and focuses heavily on spinal mobility and deep core engagement. Barre uses a vertical support structure, incorporates more standing lower-body work, and often includes a more significant cardiovascular element. Many adults find them highly complementary.

    Is barre safe if I have knee or hip issues?
    For many people with mild joint discomfort, barre’s low-impact nature makes it a safer option than high-intensity training. However, some movements — like deep plié squats or wide turnout positions — can stress vulnerable joints if done incorrectly. Always consult your physician or physical therapist before starting if you have a diagnosed condition, and work with a certified instructor who can modify exercises appropriately.

    Do I need to take classes, or can I practice barre at home?
    Both work. Online platforms and apps offer guided barre classes that are very effective for home practice. That said, in-person instruction is valuable early on because form feedback is difficult to self-correct. If you start at home, use a mirror and record yourself occasionally to check alignment.

    Start Small, Stay Consistent, See Real Change

    Barre isn’t a fitness trend — it’s a time-tested method that builds the kind of strength, stability, and body control that makes you feel better in your everyday life. The "burn" is real, the results are real, and the barrier to entry is remarkably low.

    You don’t need to be flexible, coordinated, or in peak shape to begin. You just need a chair, a small patch of floor, and the willingness to show up consistently. Two sessions this week is a better starting point than waiting for the perfect moment.

    Start with one 20-minute beginner routine today. Notice how your body feels afterward. That’s your data point — and your first step toward something genuinely sustainable.


    This article is for informational and educational purposes only. The content is not intended to replace professional medical, nutritional, or fitness advice. Always consult a qualified healthcare provider, registered dietitian, or certified fitness professional before starting a new health program or making significant changes to your lifestyle.

    Content reviewed by our wellness editorial team, with references to peer-reviewed research and guidelines from leading health organizations.

  • Foam Rolling for Adults: Recovery, Mobility & Pain Relief

    Foam Rolling for Adults: Recovery, Mobility & Pain Relief

    You finish a solid workout, feel great — and then wake up the next morning barely able to walk down the stairs. If that sounds familiar, your recovery routine might be missing one simple tool.

    Introduction

    Here’s a number worth knowing: according to the American College of Sports Medicine, inadequate recovery is one of the top reasons active adults plateau, get injured, or quit exercising altogether. And yet most people spend zero minutes on structured recovery — they just stop moving and hope for the best.

    Foam rolling has quietly become one of the most evidence-supported self-care practices in fitness. You’ve probably seen those cylindrical foam tools in gyms, physical therapy offices, and even yoga studios — but you might not know exactly how to use one, when to use it, or why it actually helps.

    This guide breaks down the real science behind foam rolling, how it fits into a well-rounded fitness routine, and exactly how adults aged 25 to 60 can use it to move better, recover faster, and feel less beat-up after training. Whether you’re brand new to this or you’ve been half-heartedly rolling your IT band for years, there’s something here for you.

    Focus keyword upfront: foam rolling for adults is not just a trend — it’s a practical, accessible recovery tool that delivers real results when used correctly.

    Why Foam Rolling Matters More Than You Think

    Most people treat recovery like an afterthought. You work out, you eat something, you sleep — and you call it done. But muscle soreness, stiffness, and restricted movement are signs that your soft tissue needs more attention than that.

    Foam rolling is a form of self-myofascial release (SMR) — a technique that applies sustained pressure to the connective tissue surrounding your muscles. Fascia, the thin web of connective tissue that wraps around every muscle in your body, can become tight, knotted, and adhesive from repetitive movement, prolonged sitting, or high-intensity exercise.

    According to research published in the International Journal of Sports Physical Therapy, foam rolling after exercise significantly reduces delayed-onset muscle soreness (DOMS) and helps restore range of motion within 24 to 72 hours post-workout. That matters because when you’re less sore and more mobile, you’re more likely to stick to your training schedule — which is ultimately what drives results.

    Beyond soreness, stiff fascia can alter your movement patterns over time. Tight hips make squats sloppy. A locked-up thoracic spine limits shoulder mobility. Poor ankle mobility shifts load to your knees. Foam rolling addresses these restrictions before they become injuries.

    For adults over 35 especially, recovery takes longer due to natural changes in muscle fiber repair rates and reduced collagen turnover. Adding even 10 minutes of foam rolling to your post-workout routine can meaningfully support that longer recovery curve.

    The Science Behind Foam Rolling: How It Actually Works

    There’s a common myth that foam rolling "breaks up" scar tissue or "flushes out" lactic acid. Neither of those things is quite accurate — and the real mechanism is just as interesting.

    Foam rolling appears to work through two primary pathways. The first is neurological: sustained pressure on a muscle activates specialized receptors called Golgi tendon organs and mechanoreceptors, which signal the nervous system to reduce muscle tension. Essentially, you’re convincing your body it’s safe to relax.

    The second pathway is circulatory: pressure and release from a foam roller temporarily compresses local blood vessels, and when released, blood flow increases to that area — delivering oxygen and clearing metabolic waste. A study in the Journal of Athletic Training found that foam rolling the quadriceps for just 20 seconds improved blood flow and reduced perceived soreness in recreational athletes compared to a control group.

    One misconception worth busting: foam rolling is not the same as stretching, and it shouldn’t replace it. Stretching lengthens the muscle; rolling targets the fascia and neuromuscular tension. They complement each other but do different things. Ideally, you roll first to reduce tension, then stretch to lengthen the muscle through its full range.

    Research from Harvard Health Publishing also notes that foam rolling can be beneficial for people with mild chronic low back pain and hip flexor tightness — both extremely common in desk-working adults — by reducing myofascial restrictions and improving segmental mobility.

    How to Get Started with Foam Rolling

    The good news: you don’t need a gym membership or a trainer to start. A quality foam roller costs between $15 and $40, and you can use it at home in under 15 minutes.

    Beginner Protocol (10-15 minutes, 3x per week)

    1. Choose the right roller: Start with a smooth, medium-density foam roller (not the spiky trigger point version). High-density and textured rollers are better suited for intermediate and advanced users with established tissue tolerance.
    2. Roll slowly — 1 inch per second: Most people roll too fast. The goal is to apply sustained pressure, not speed. Move about one inch per second along the muscle belly.
    3. Pause on tender spots: When you hit a tight or tender area, pause for 20 to 30 seconds and breathe deeply. Don’t roll aggressively over it — hold it.
    4. Start with large muscle groups: Begin with calves, hamstrings, quadriceps, and upper back (thoracic spine). These are the safest, most impactful areas for beginners.
    5. Avoid rolling your lower back directly: The lumbar spine lacks the structural support that the thoracic spine has. Roll your glutes and lats instead to indirectly address lower back tightness.
    6. Spend 60 to 90 seconds per muscle group: You don’t need to roll for 10 minutes per muscle. 60 to 90 seconds per area is enough to create a neurological and circulatory response.

    Intermediate Option: Add targeted trigger point work using a lacrosse ball or textured roller for areas like the glutes, hip flexors, and pectorals. These smaller tools allow more precise pressure on stubborn knots.

    Advanced Option: Use foam rolling as part of a structured warm-up before training — rolling tight areas first, then performing dynamic stretches to prepare joints for load. This is a common practice recommended by the National Academy of Sports Medicine (NASM) in their corrective exercise protocols.

    Common Mistakes That Sabotage Your Foam Rolling Results

    Foam rolling is simple — but simple doesn’t mean effortless. These are the mistakes that keep most people from getting real benefit:

    1. Rolling too fast
    This is the number one error. Fast rolling feels like a massage, but it doesn’t create the sustained pressure needed to trigger a neuromuscular response. Slow down. Think of it like giving the tissue time to "read" the pressure and respond.

    2. Rolling directly over joints or bones
    The IT band is a classic example. Many people aggressively roll the outer thigh — which is actually a dense band of connective tissue, not a muscle — expecting it to loosen up. The better approach is to roll the tensor fasciae latae (TFL) at the hip and the lateral quad, which are the muscles pulling the IT band tight. Never roll over your knee joint, elbow, or spine directly.

    3. Skipping it when you’re sore
    Counterintuitively, people often skip foam rolling on the days they need it most — when they’re sore. Light foam rolling on sore muscles (using less pressure, slower pace) can actually speed up recovery. The key is to reduce the pressure and be gentler, not to avoid it altogether.

    4. Only rolling after workouts
    Foam rolling is also effective first thing in the morning to reduce overnight stiffness, or during the day if you sit for long hours. Adults who sit at a desk for 6 or more hours daily can especially benefit from a mid-day glute and thoracic spine rolling session.

    5. Expecting immediate structural change
    Foam rolling isn’t going to permanently fix muscle imbalances in one session. Results are cumulative — consistent use over several weeks is what produces lasting improvements in mobility and reduced soreness. Think of it like flossing: one session helps, but the habit is what creates long-term benefit.

    Best Areas to Target and What to Avoid

    Not every body part benefits equally from foam rolling. Here’s where to focus — and what the Academy of Nutrition and Dietetics’ exercise-science counterparts in physical therapy recommend avoiding:

    High-Priority Areas for Most Adults:

    • Thoracic spine (mid-back): Most desk workers have a hyperkyphotic (rounded) upper back. Rolling the mid-back can restore extension and relieve shoulder and neck tension. Place the roller horizontal to your spine, support your head, and gently extend over it.
    • Glutes and piriformis: Tight glutes contribute to low back pain and poor hip mechanics. Sit on the roller with one ankle crossed over the opposite knee for a targeted release.
    • Hip flexors (psoas area): Chronic sitting shortens the hip flexors. Roll the front of the hip just below the ASIS (hip bone) to address this.
    • Calves and soleus: Often overlooked, tight calves limit ankle mobility and can affect everything from squatting form to running stride. Stack one leg on top of the other for increased pressure.
    • Lats and teres major: Critical for shoulder health and overhead movement. Roll the side of your body from the armpit down toward the mid-back.

    Areas to Approach With Caution or Avoid:

    • Lumbar spine (lower back) — roll glutes and lats instead
    • Back of the knee (popliteal fossa) — sensitive vascular area
    • Front of the neck — carotid arteries are present
    • Directly on the IT band with heavy pressure — counterproductive for most people

    If you’re managing a specific injury or chronic condition, always get clearance from a physical therapist or sports medicine physician before targeting that area with a roller.

    For a more complete recovery-focused fitness routine, pairing foam rolling with low-impact cardio options like power walking or cycling can significantly reduce muscle fatigue between harder training sessions.

    How Long Until You See Results — and What to Track

    This is where expectations need to be honest. Foam rolling is not a quick fix — but it does produce measurable changes on a realistic timeline.

    Week 1-2: Most people notice reduced post-workout soreness and a modest improvement in how their muscles feel before and after exercise. You may also feel slightly less stiff in the morning. These are early neurological responses — real, but temporary unless the habit sticks.

    Week 3-6: With consistent use (3 to 5 times per week), you’ll likely notice improved range of motion in targeted areas. Squats may feel more comfortable, shoulder mobility may improve, and posture during prolonged sitting may become easier to maintain. Research published in the Journal of Sports Rehabilitation found statistically significant improvements in hip flexion and hamstring flexibility after just four weeks of consistent foam rolling in sedentary adults.

    Week 6-12: Cumulative improvements in movement quality, reduced injury risk, and better mind-muscle connection during workouts are common outcomes reported in the literature for regular foam rolling practitioners.

    What to Track:

    • Rate your soreness on a 1-10 scale the day after workouts (track this weekly)
    • Perform a simple range-of-motion test: standing toe touch, overhead reach, or a deep squat — note how it feels before and after rolling
    • Track whether tight areas become less tender over time (less pain on the same pressure means progress)
    • Monitor workout consistency — are you missing fewer sessions due to soreness?

    If you’ve been rolling consistently for 8 weeks and haven’t noticed any improvement in mobility or soreness, consider consulting a physical therapist. Persistent restriction may have a structural cause that self-myofascial release alone won’t address.

    If you’re incorporating foam rolling into a broader fitness program, you might also find value in pairing it with structured balance training or Pilates — both of which emphasize body awareness, muscle control, and injury prevention in ways that complement foam rolling’s recovery benefits.

    Frequently Asked Questions

    Is foam rolling safe for older adults?
    Generally, yes — foam rolling is considered low-risk for healthy adults of all ages. However, adults over 50 should start with a softer roller and lighter pressure, especially if they have osteoporosis, varicose veins, or joint replacements. Always check with your physician if you have a chronic condition before starting.

    Should I foam roll before or after a workout?
    Both can be beneficial, but serve different purposes. Pre-workout rolling (2 to 5 minutes on tight areas) helps reduce neuromuscular restriction before movement. Post-workout rolling (10 to 15 minutes) supports recovery and reduces soreness. The research slightly favors post-workout rolling for soreness reduction specifically.

    How hard should I press?
    A common benchmark: you want a "good pain" sensation — uncomfortable but tolerable, around a 5 to 7 out of 10 discomfort level. If you’re bracing, holding your breath, or cringing, that’s too much pressure. Reduce it. You should be able to breathe normally and relatively relax into the roller.

    Can I foam roll every day?
    Yes — daily foam rolling is safe and often beneficial for most adults, especially if sessions are 10 to 15 minutes and not overly aggressive. In fact, consistency is the biggest predictor of results. Short daily sessions outperform long occasional ones.

    Does foam rolling help with weight loss?
    Not directly. Foam rolling doesn’t burn significant calories. However, by improving recovery and reducing soreness, it can support a more consistent exercise schedule — which does contribute to weight management over time. It’s a recovery tool, not a primary fat-loss strategy.

    Conclusion

    You don’t need an expensive recovery gadget or a two-hour spa session to feel better after training. A simple foam roller, 10 to 15 minutes of intentional practice, and a bit of consistency is genuinely enough to make a difference in how you feel, move, and perform.

    The research is clear: foam rolling reduces soreness, improves range of motion, and supports better movement patterns over time. And perhaps more importantly — it helps you keep showing up. Fewer missed sessions due to soreness means more progress, more momentum, and a stronger long-term relationship with your health.

    Start tonight. Pick three muscle groups, roll each one for 90 seconds, and notice how you feel in the morning. Small steps, taken consistently, always win.


    Wellness Disclaimer: This article is for informational and educational purposes only. The content is not intended to replace professional medical, nutritional, or fitness advice. Always consult a qualified healthcare provider, registered dietitian, or certified fitness professional before starting a new health program or making significant changes to your lifestyle.

    Author Line: Content reviewed by our wellness editorial team, with references to peer-reviewed research and guidelines from leading health organizations.